Amazeballs V1.0
This setup guide from www.3dnames.co will guide you through how you can create the following Amazeballs using our Blender file.
We have designed this download file to be used by anyone, and you do not have to have any knowledge of using Blender as long as you follow this step by step guide.
We have made this guide interactive, with checkboxes to tick off at each step, so you can keep track of your progress.
Happy Animating!
Video Previews
This video is available in both Landscape and Portrait modes, easily switch between each camera using our included Panel Script. Portrait mode is perfect for Instagram Stories and TikTok!
Create these animations with any text you like using our Blender file and this guide!
Need help? Chat to us on our Discord Channel
Join our DiscordYou will need Blender Installed...
Please make sure you have Blender v4.0.1 installed on your computer, you can download it for free from https://www.blender.org/download/releases/4-0/ - this file was made using Blender v4.0.1
Interactive Guide - toggle the switch on each step to mark it as completed!
Steps quick overview
1. Open Blender File
Mark as completedDownload the ZIP file, extract it somewhere and open up the BallDownStepsV1.0.blend file in Blender, we recommend using version Blender 4.0.1 or higher.
2. Install the Molecular+ Add-on
Mark as completed(You can skip this step if it's already installed!) This file uses the Molecular+ Add-on to create the balls dropping effect, it is included in the zip file in a sub folder called /install-files/ - we have included all 3 version for Windows, Mac and Linux - to install it follow the screenshot steps below
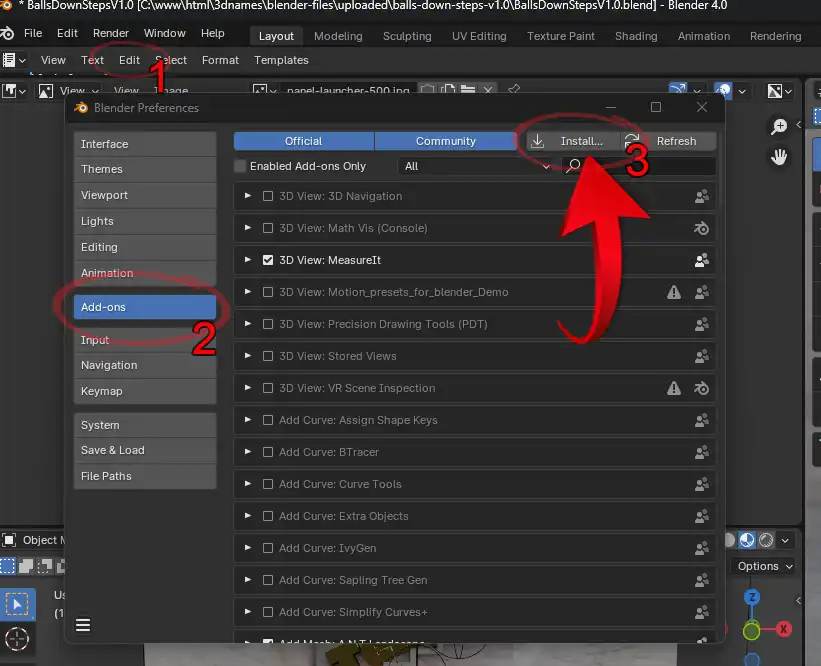
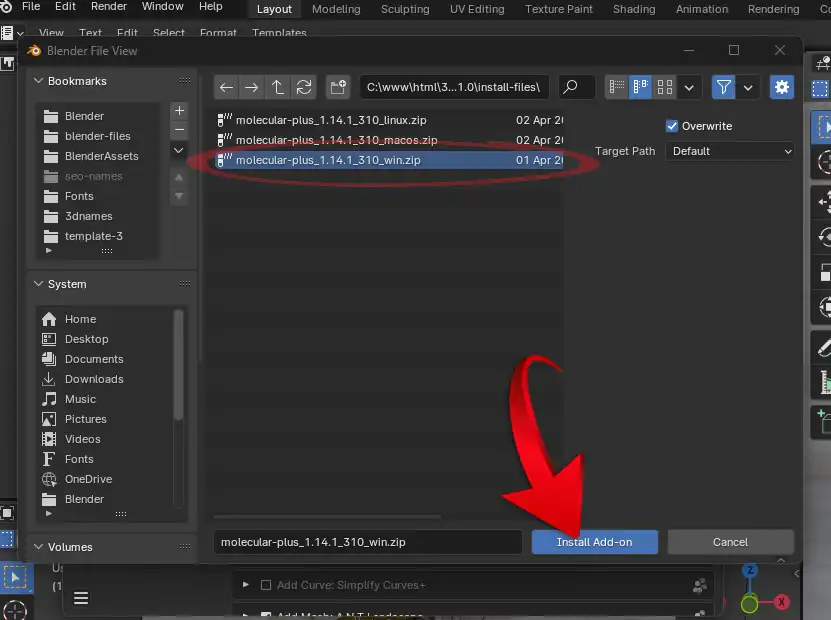
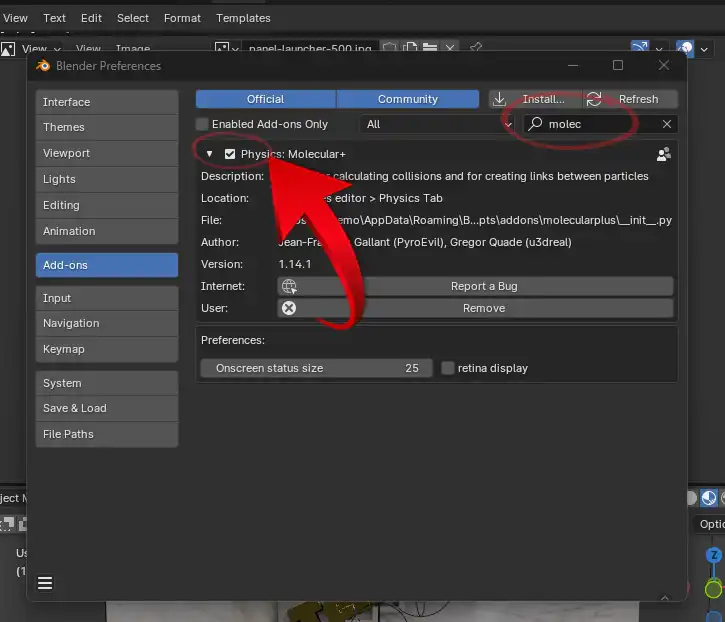
Edit --> Preferences --> Add-ons --> Install --> Navigate to the /install-files/ folder and select the correct version for your OS --> Install Add-on --> Search for Add on and Check the box to enable it.
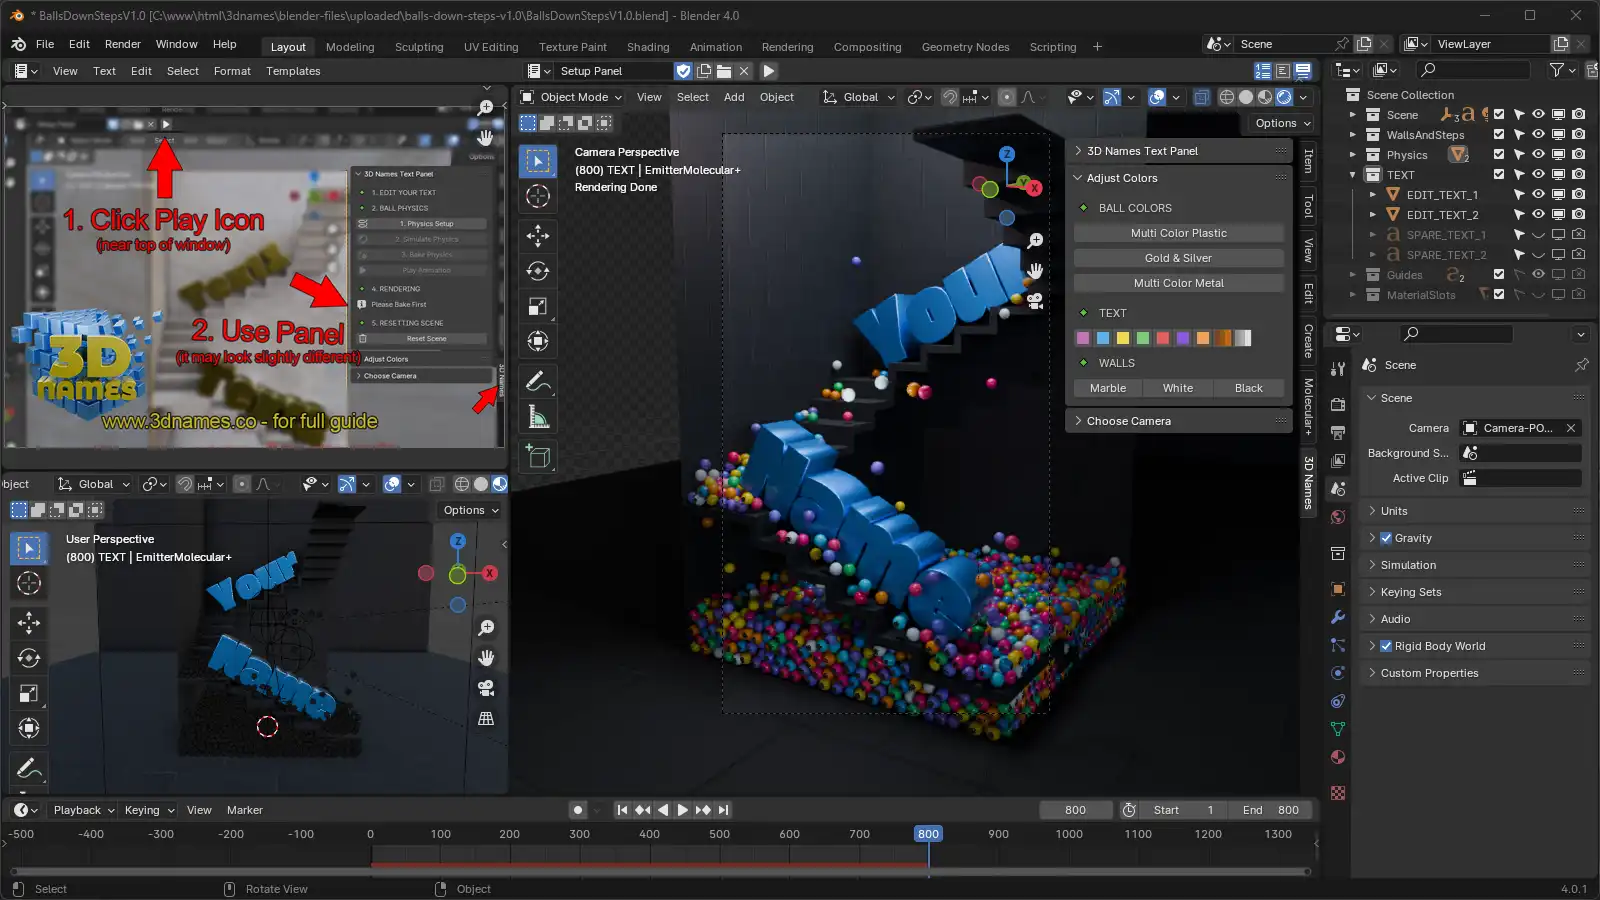
3. Launch the 3D Names Panel
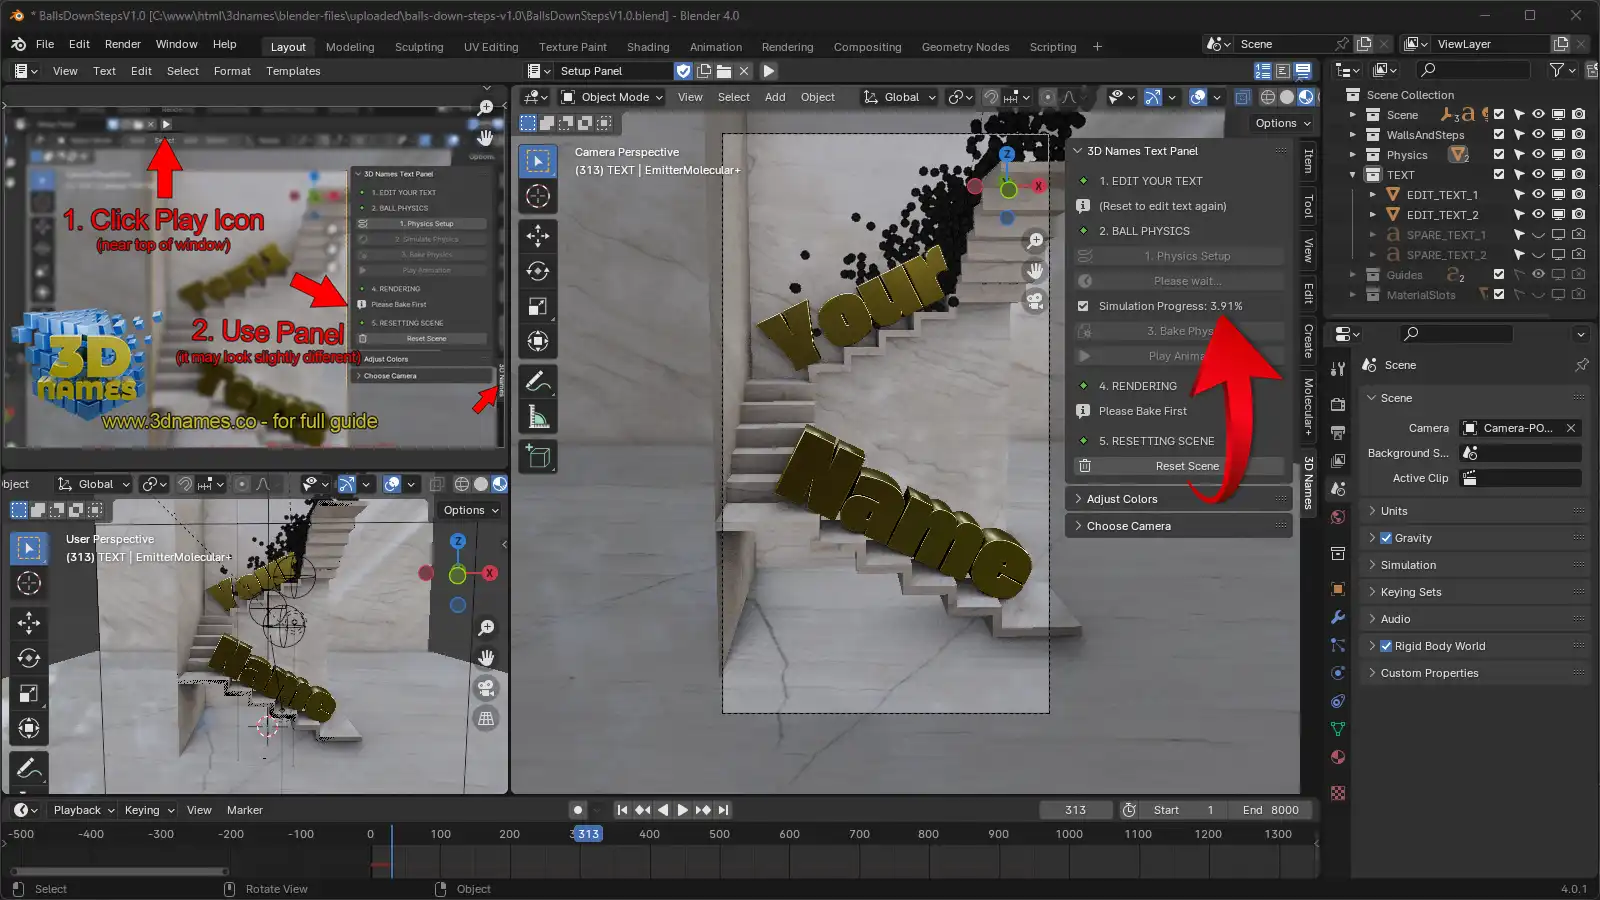
Mark as completedWhen you open the file - all you need to do is press the small play icon ▷ at the top - then in the 3D Viewport there will be a new Panel called "3D Names" - this contains all of the setup scripts to make this files effect work.
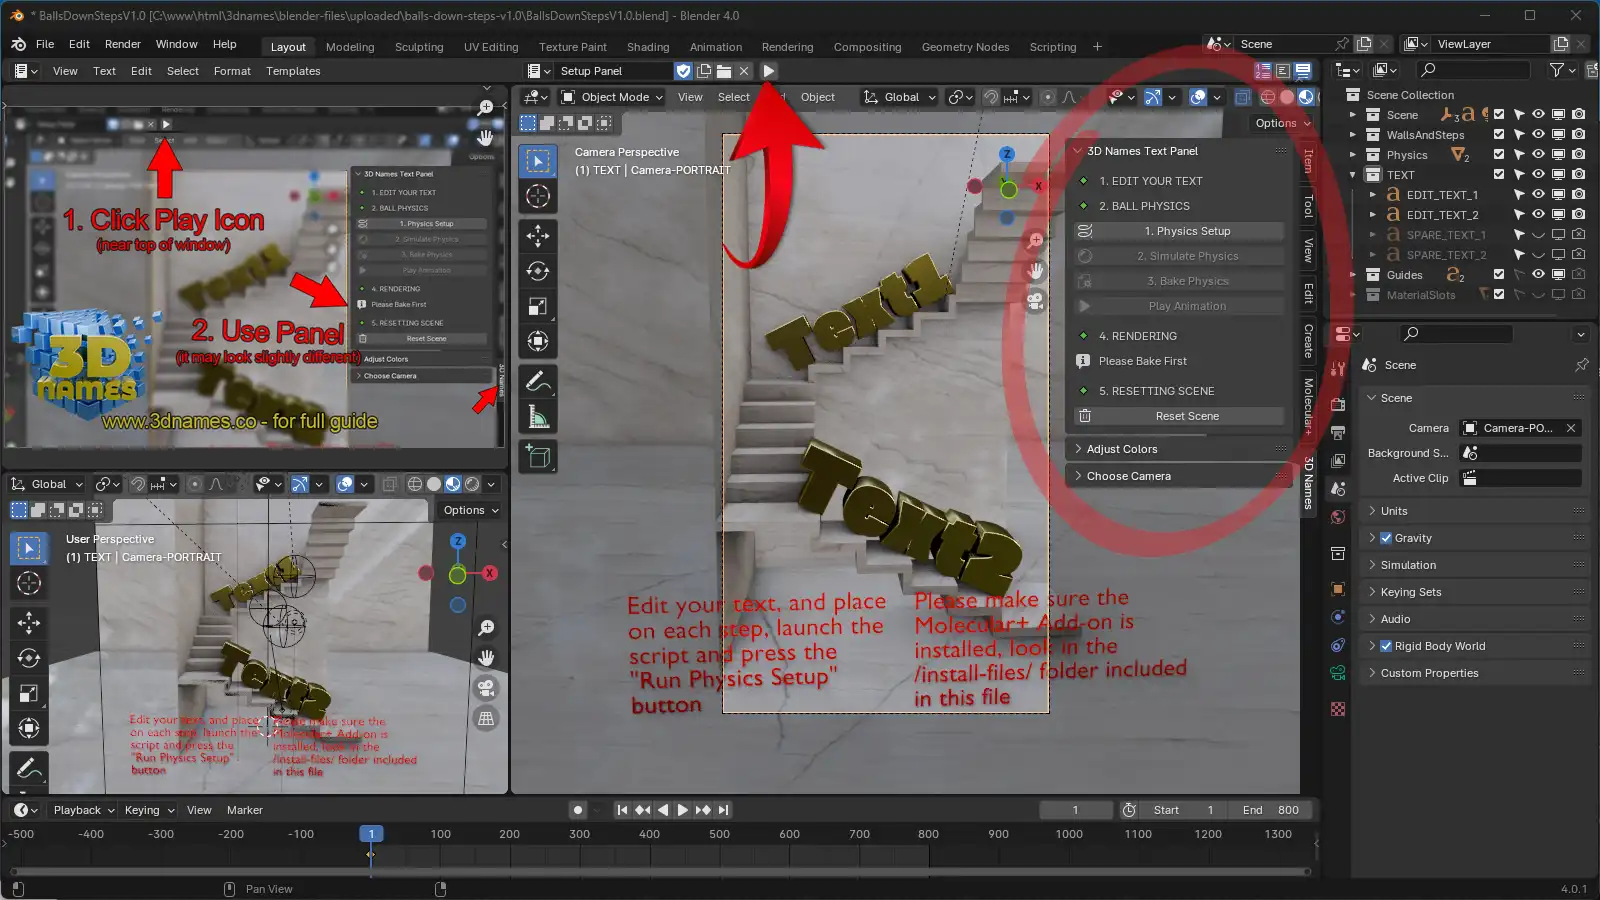
As you can see above this is the new Panel that does all the hard work for us!
4. Edit your text
Mark as completedThere are 2 text objects you can edit, "Text1" and "Text2" - to edit them select each one and press the "Tab" key on your keyboard to enter edit mode. Now you can type your own text, then press the "Tab" key again to exit edit mode.
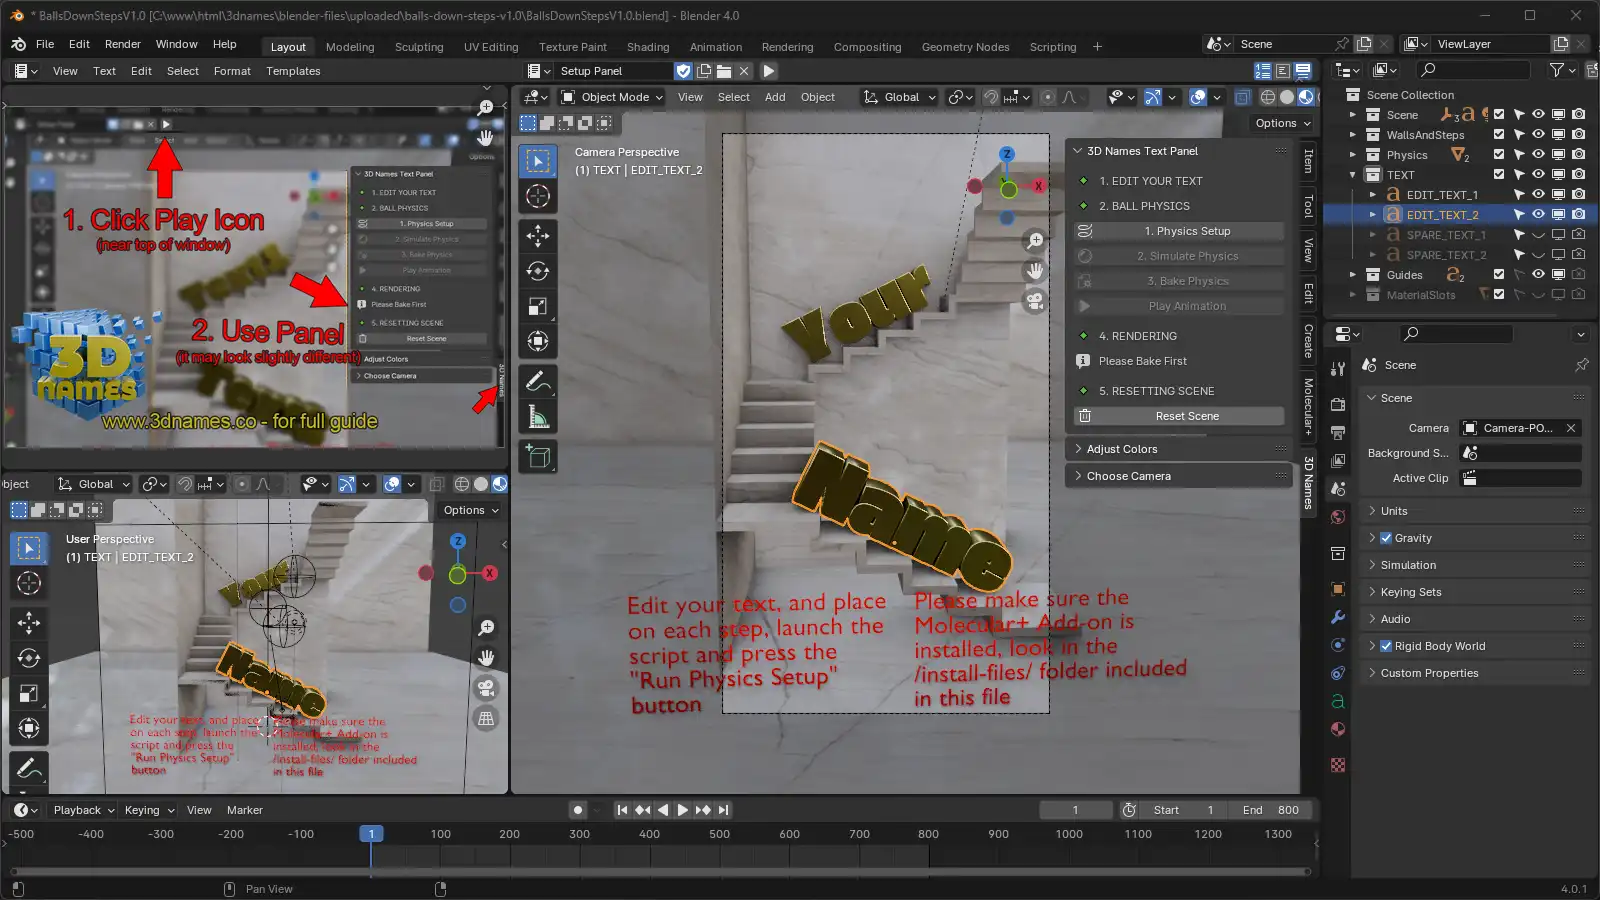
👆 Here we have edited the 2 text objects text to say "Your Name" - you can edit it to say anything you want!
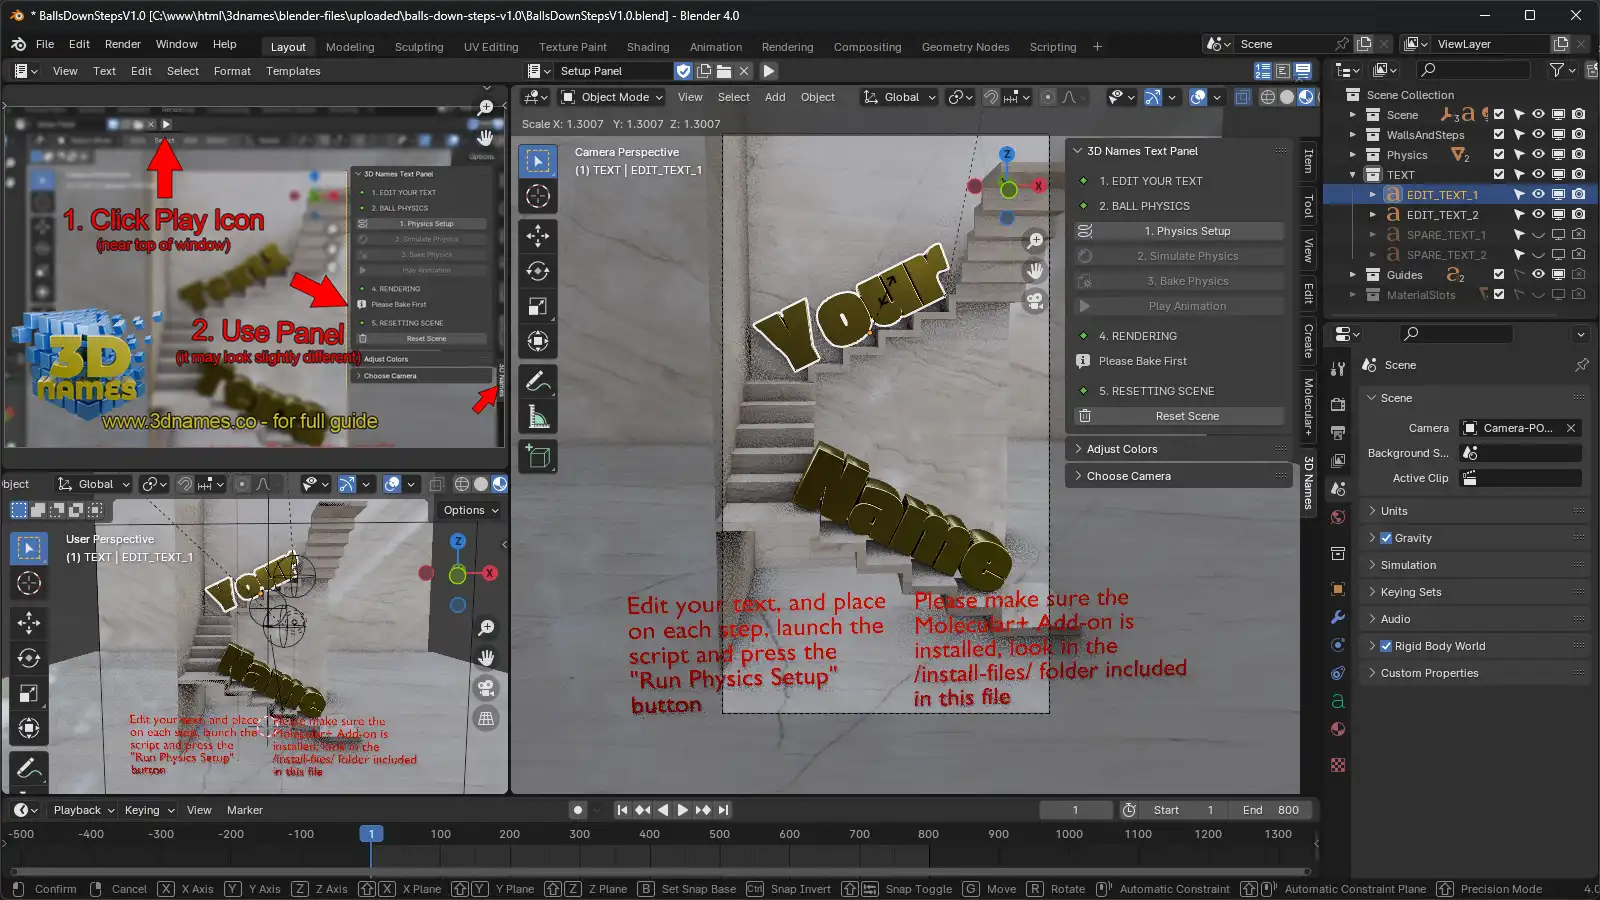
5. Scale and move you text
Mark as completedUse the "S" key on your keyboard to scale the text to the size you want. If you wish to move it, we reccomend hitting the "G" to grab it, and then if you double tap the "X" key it will lock the movement to the X axis of the text so will stay aligned to the steps.

💡 Double tapping the X key to move the text after pressing the "G" key will lock it to it's local axis! Super handy for moving more accurately.
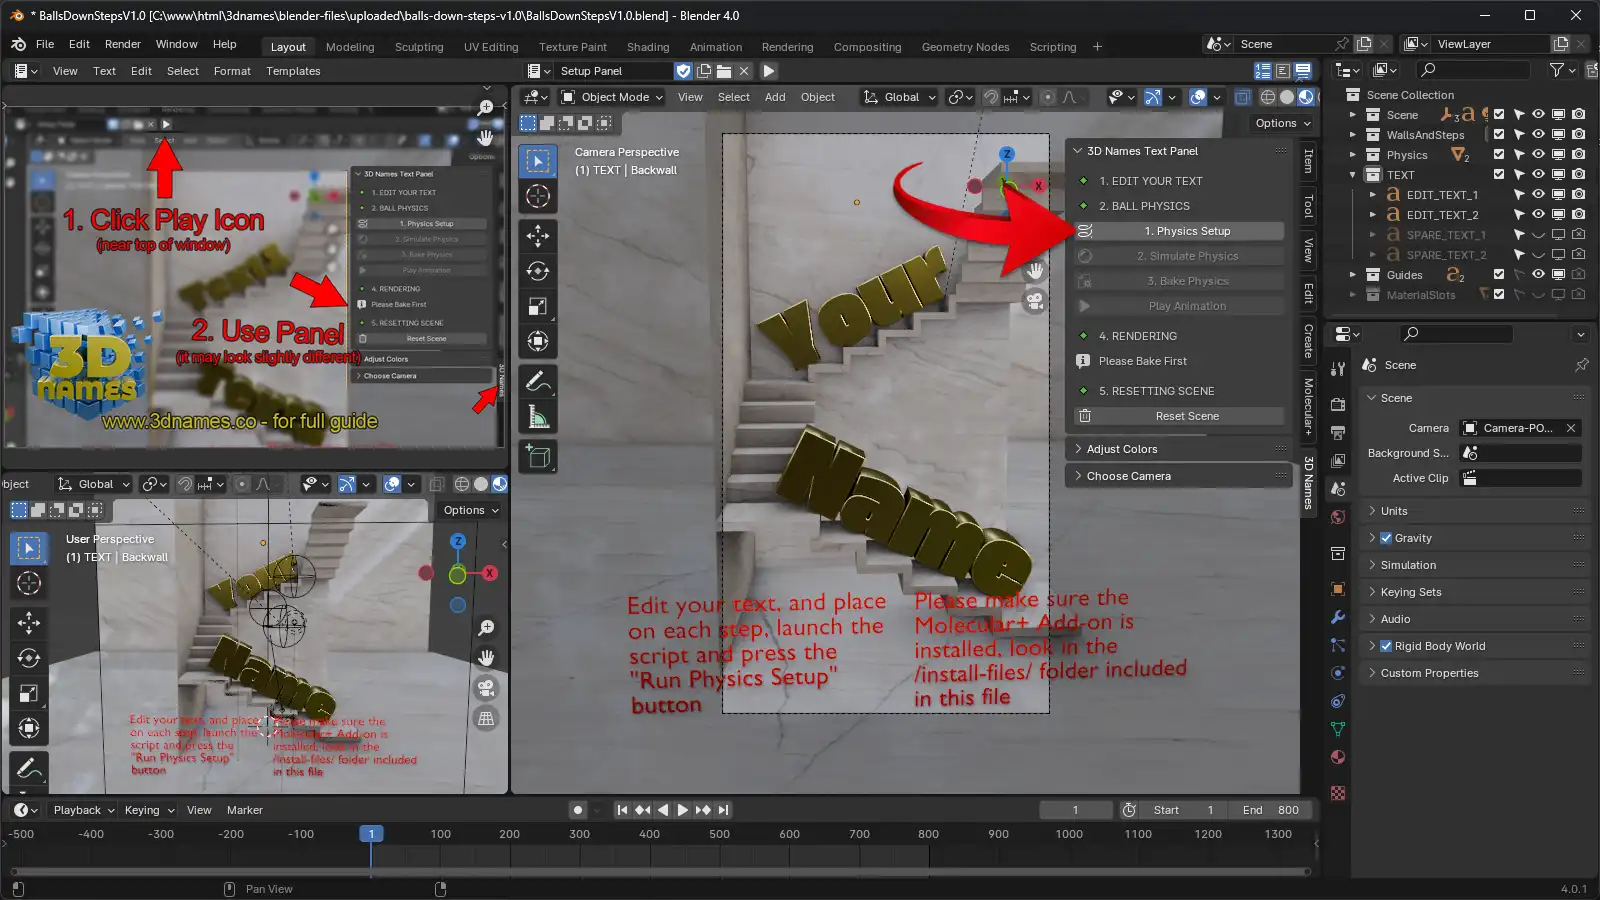
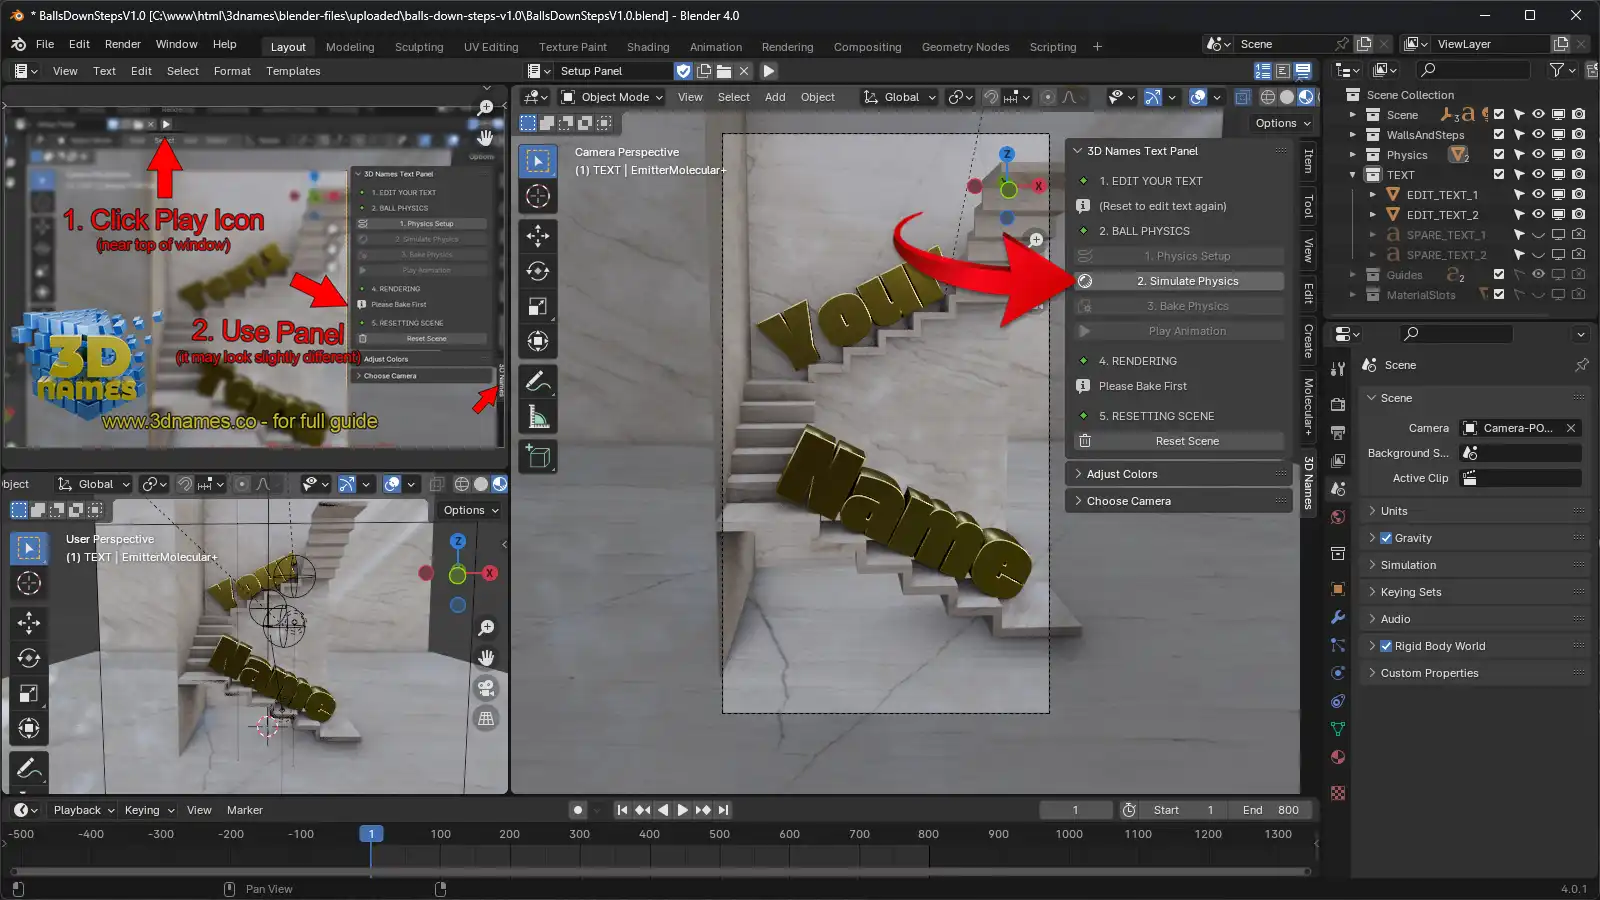
6. Run Scene Setup
Mark as completedOnce you have edited your text you now need to press the "Physics Setup" button in the 3D Names Panel. This adds all the physics setup parts. Then press the "Simulate Physics" button to start the simulation, this will take a few minutes to complete but you should see a live progress % as it happens... please make sure you wait until it's completed! Finally press the "Bake Physics" button so our simulation data will be cached!
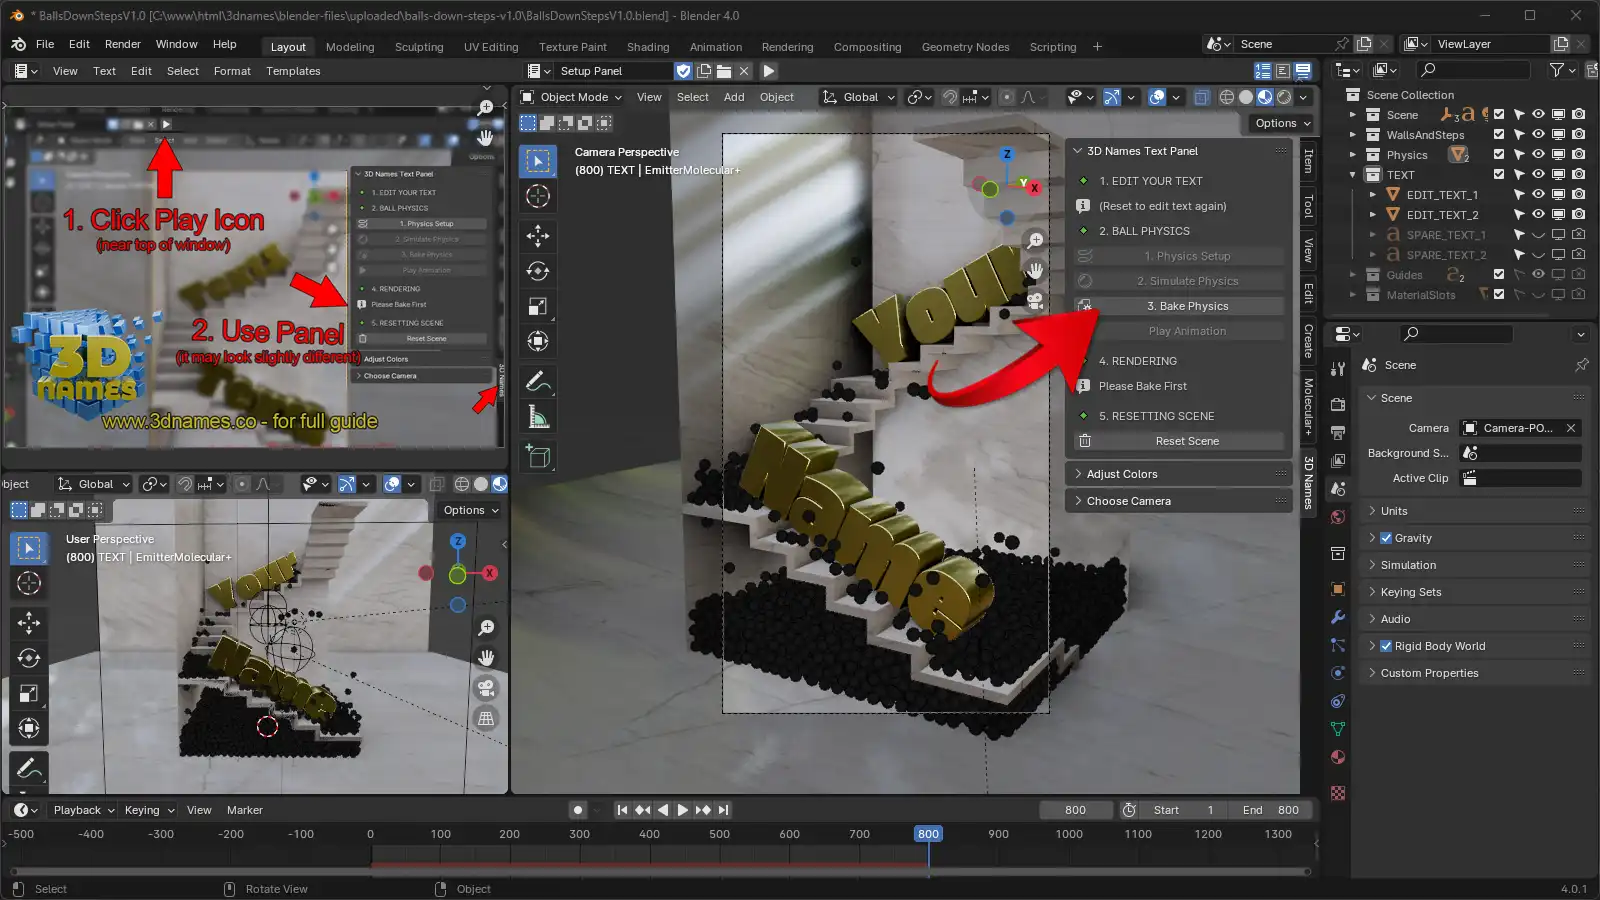
You can now save your blender file and the simulation data will be saved with it!
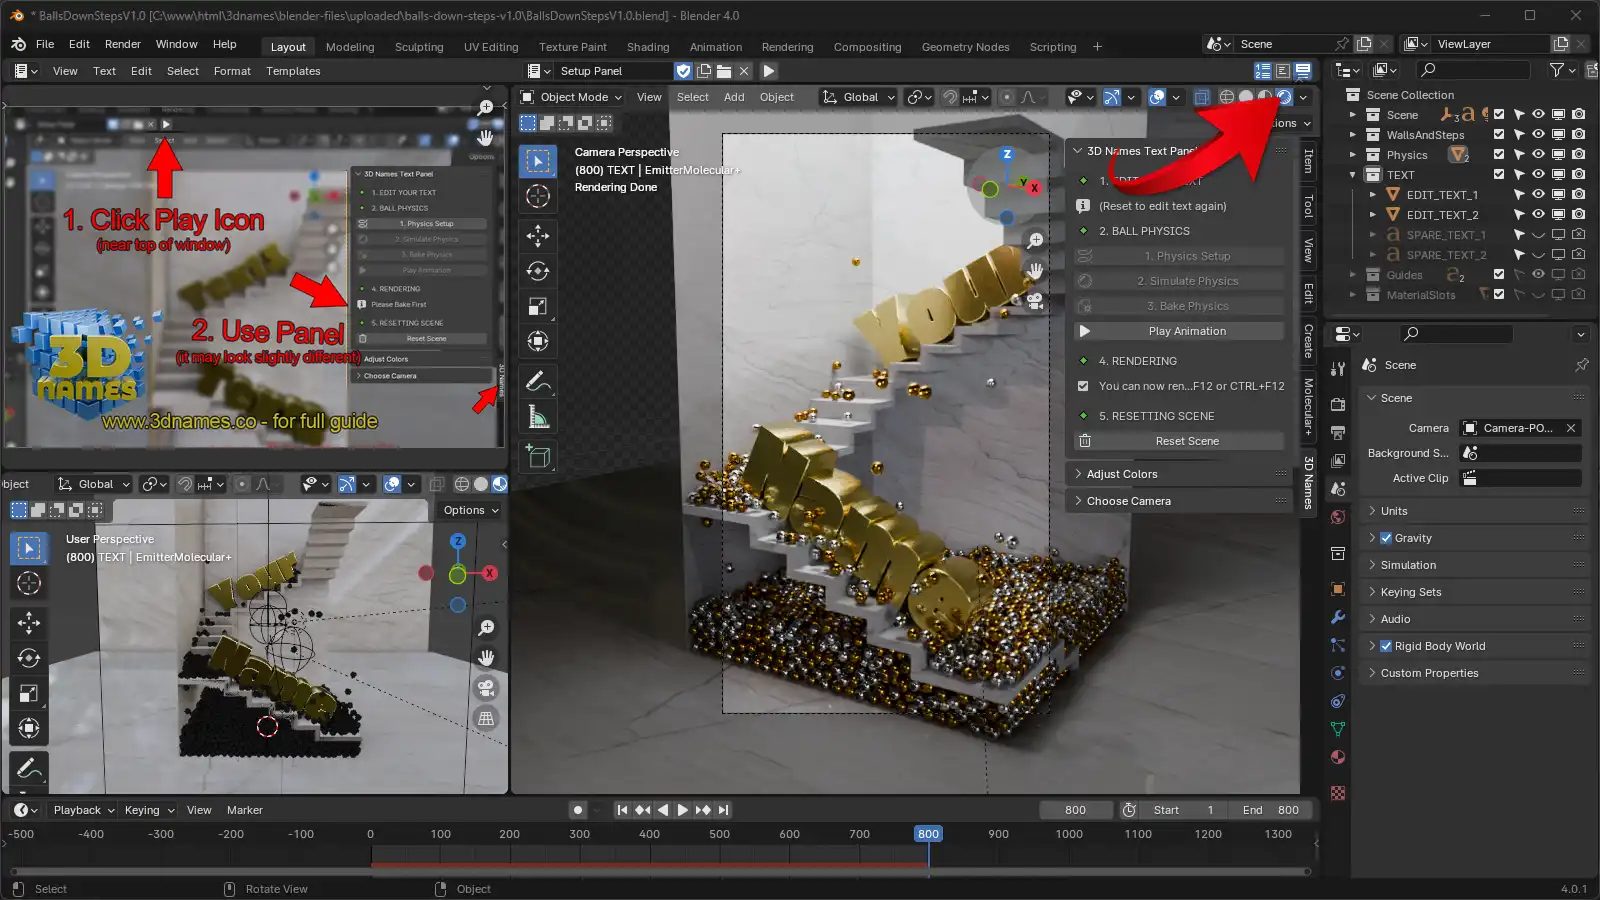
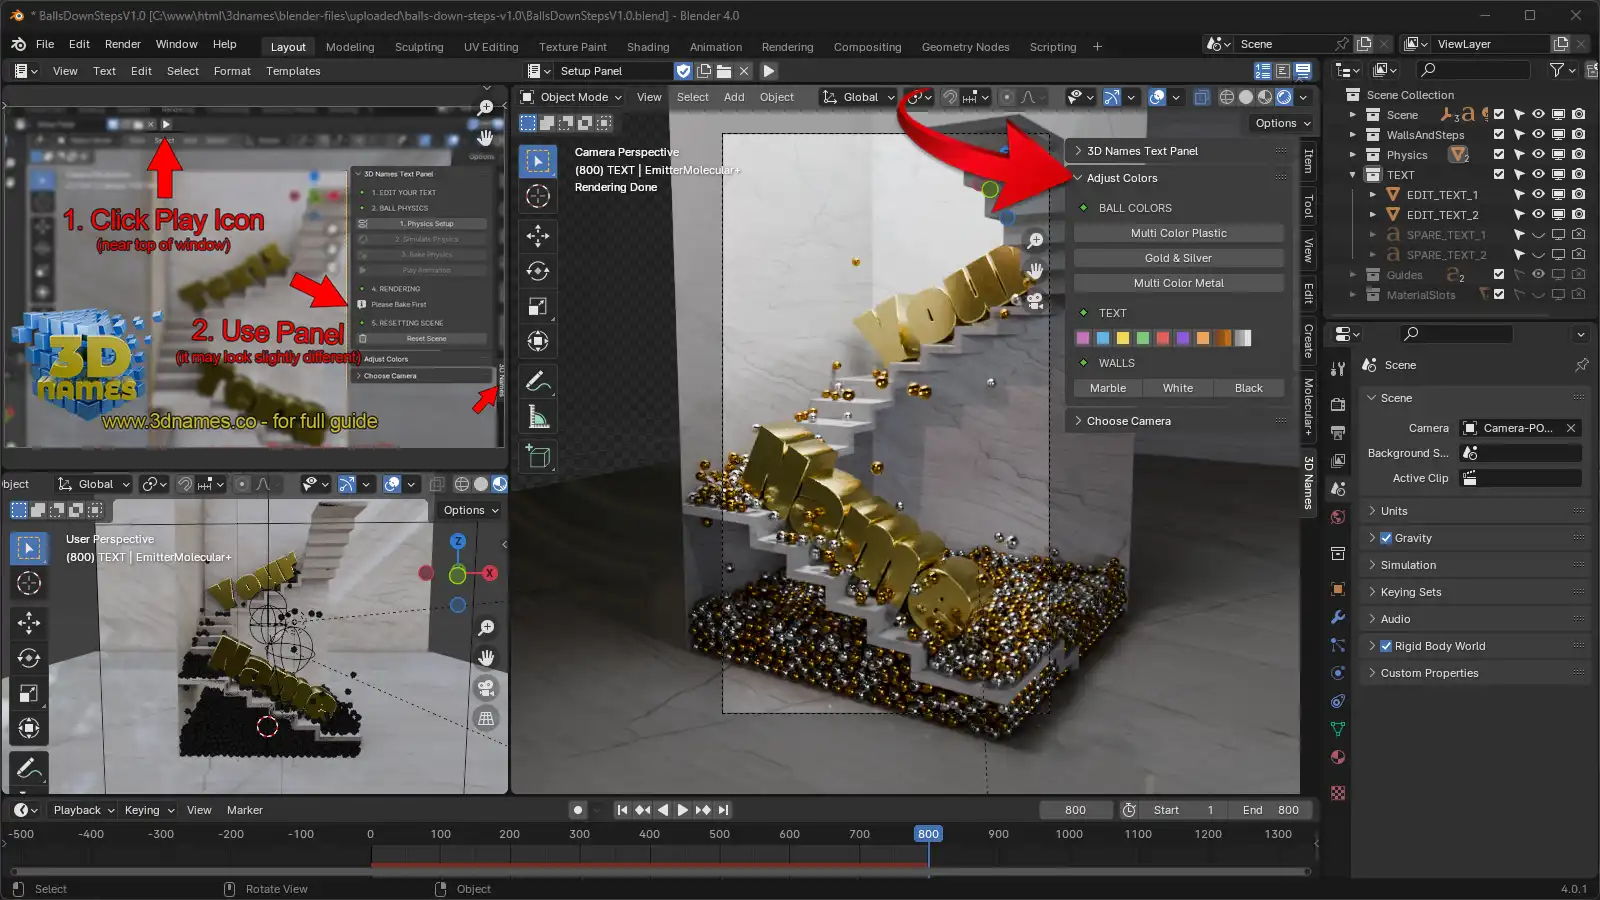
7. Switch to Rendered View and change colors
Mark as completedSwitch to the "Rendered" view by clicking the icon in the screenshot below, or by pressing the "Z" key on your keyboard and selecting "Rendered" from the menu. Now open the panel called "Adjust Colors" and here you can change the colors of the text, the balls and the background to our pre-made materials.
8. Change Camera
Mark as completedThe 3rd Panel "Choose Camera" is pretty self explanatory, you can choose from either Portrait or Landscape camera angles, just press the button and the camera will move to the correct position. Both Cameras will animate differently so you can choose the one you like the most.
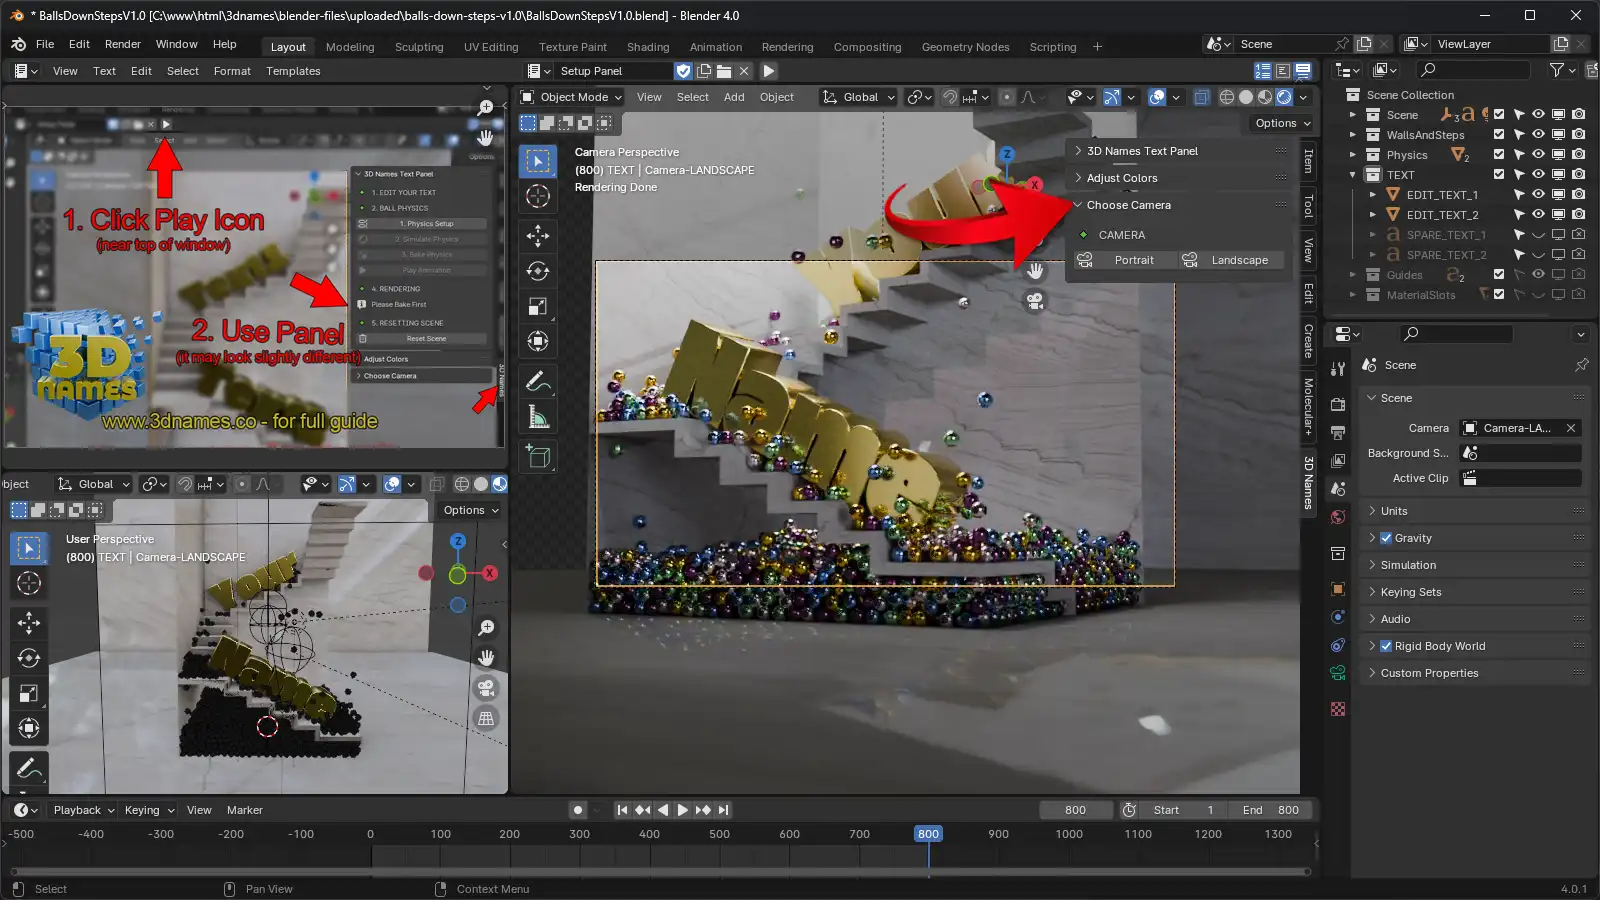
Here we have selected the Landscape camera angle, you can see the camera has moved to the correct position.
9. Rendering
Mark as completedYou can now render your scene by pressing the "F12" key on your keyboard. If you want to render the animation, press "Ctrl + F12" (or "CMD + F12" on Mac) to render the animation. Files will be saved to the "renders" folder in the same directory as the .blend file.

Here is "Your Name" rendered using the Landscape camera.