Happy Birthday V1.0
This setup guide from www.3dnames.co will guide you through how you can create the following Happy Birthday using our Blender file.
We have designed this download file to be used by anyone, and you do not have to have any knowledge of using Blender as long as you follow this step by step guide.
We have made this guide interactive, with checkboxes to tick off at each step, so you can keep track of your progress.
Happy Animating!
Video Previews
Create these animations with any text you like using our Blender file and this guide!
Need help? Chat to us on our Discord Channel
Join our DiscordYou will need Blender Installed...
Please make sure you have Blender v4.0.1 installed on your computer, you can download it for free from https://www.blender.org/download/releases/4-0/ - this file was made using Blender v4.0.1
Interactive Guide - toggle the switch on each step to mark it as completed!
Steps quick overview
- 1. Open Blender File
- 2. Launch the 3D Names Panel
- 3. Edit your text
- 4. Scale text to fit in rectangle
- 5. Optional - Edit the cake text
- 6. Choose the persons age and run setup
- 7. Render Shorter Animation (Optional)
- 8. Changing Colors
- 9. Adding Realistic Confetti (Optional)
- 10. Rendering Settings
- 11. Landscape or Portrait
1. Open Blender File
Mark as completedDownload the ZIP file, extract it somewhere and open up the HappyBirthdayV1.0.blend file in Blender, we recommend using version Blender 4.0.1 or higher.
2. Launch the 3D Names Panel
Mark as completedWhen you open the file - all you need to do is press the small play icon ▷ at the top - then in the 3D Viewport there will be a new Panel called "3D Names" - this contains all of the setup scripts to make this files effect work.
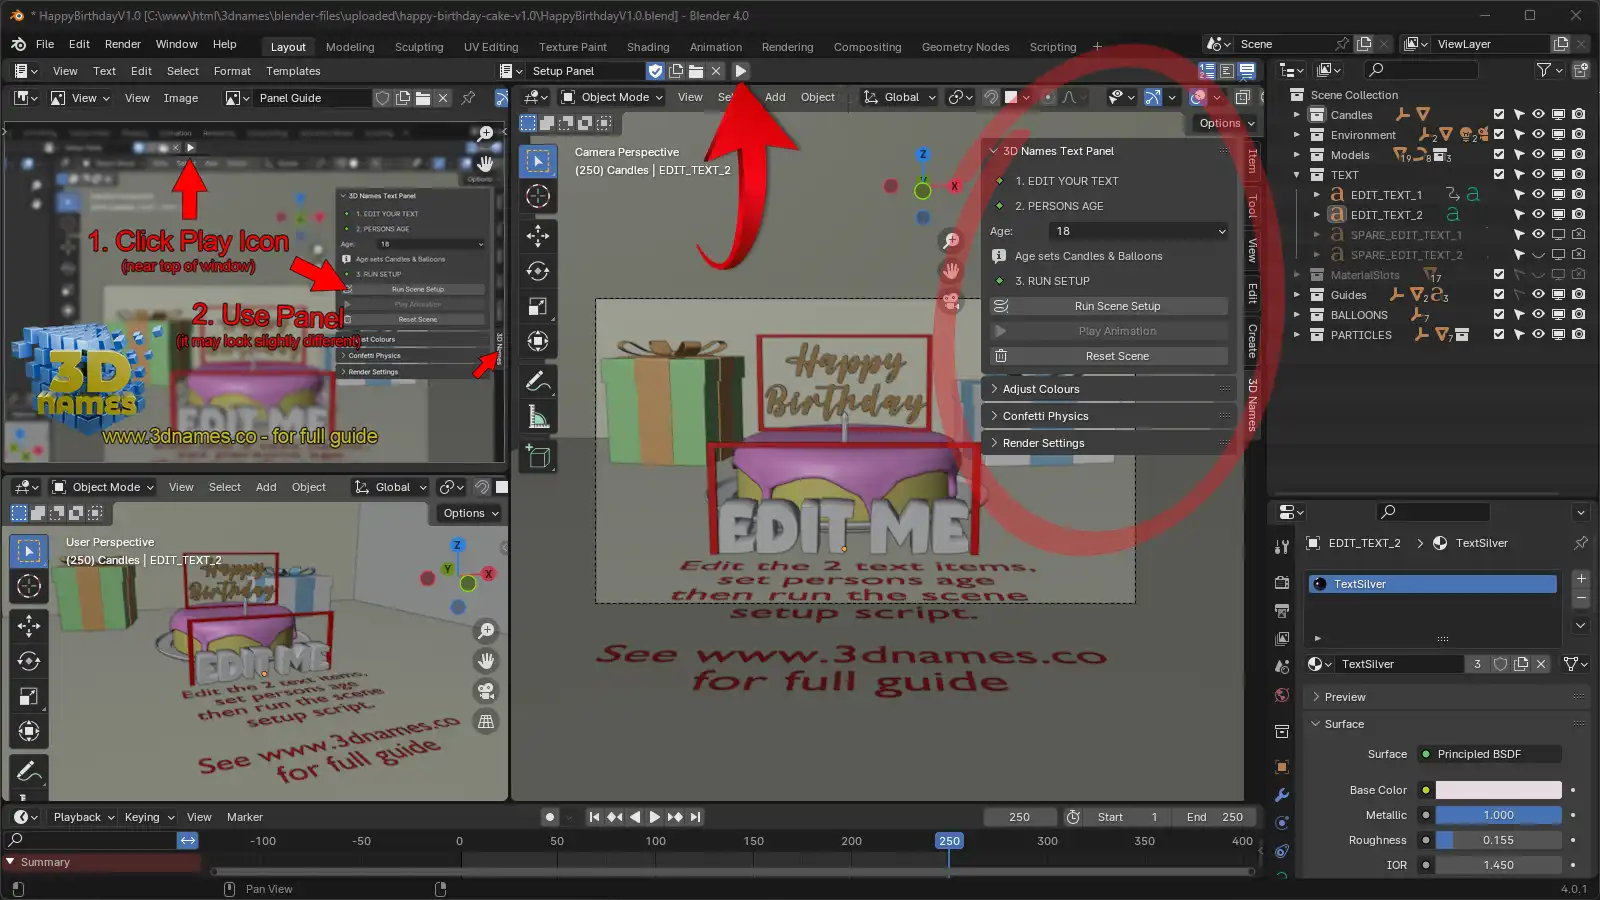
As you can see above this is the new Panel that does all the hard work for us!
3. Edit your text
Mark as completedNow select the text that says "Edit Me" and press the "Tab" key on your keyboard to enter edit mode. Now you can type your own text, then press the "Tab" key again to exit edit mode.
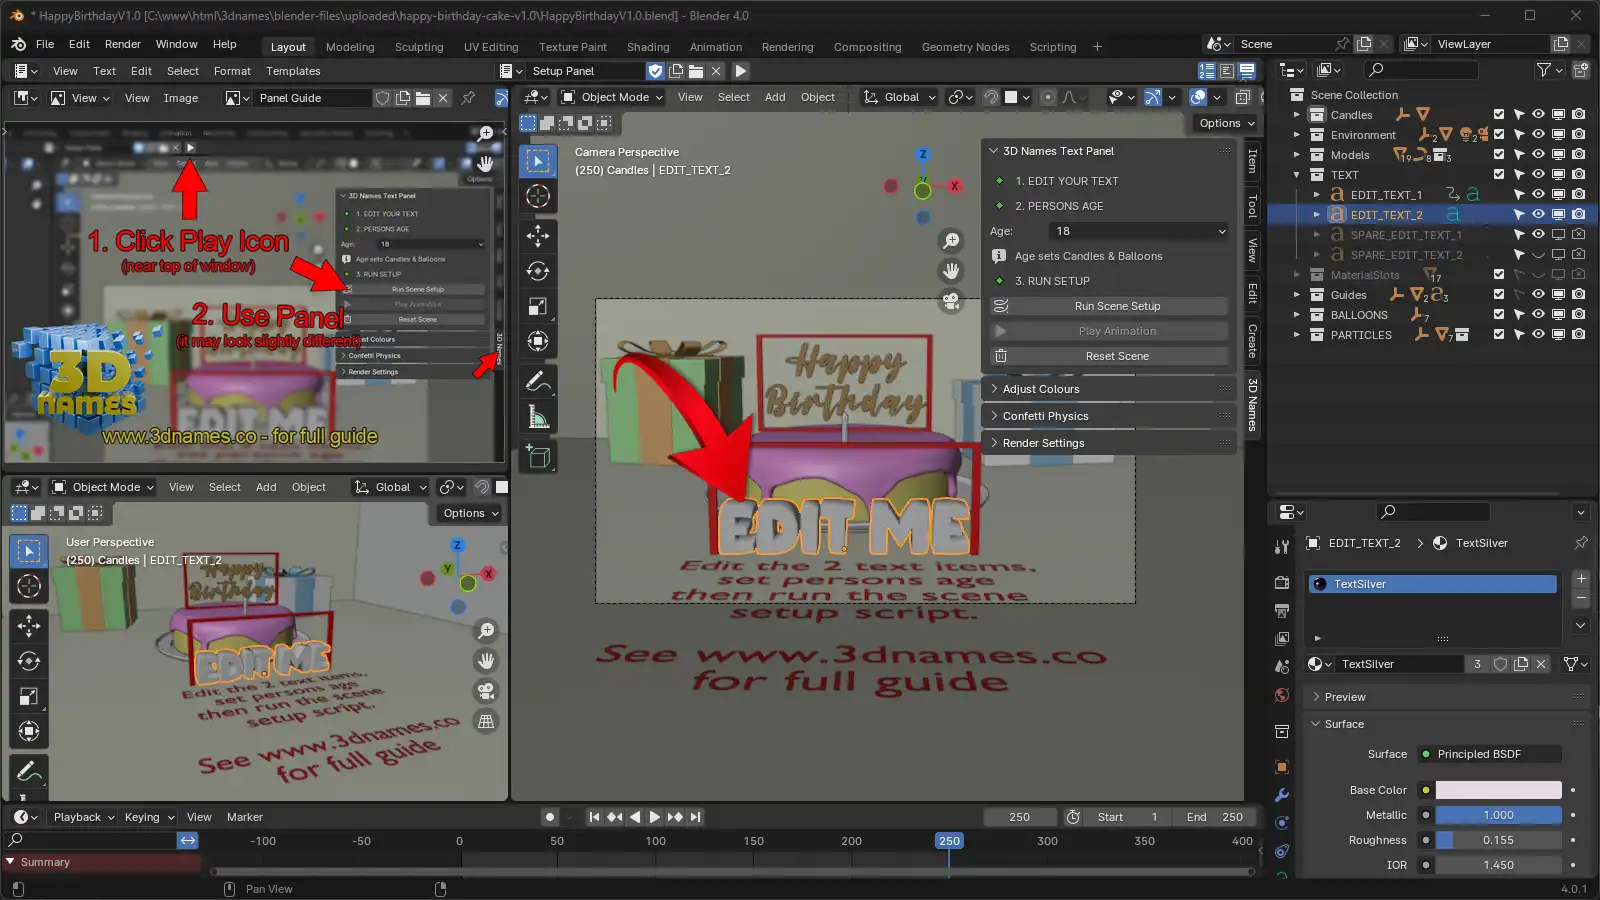
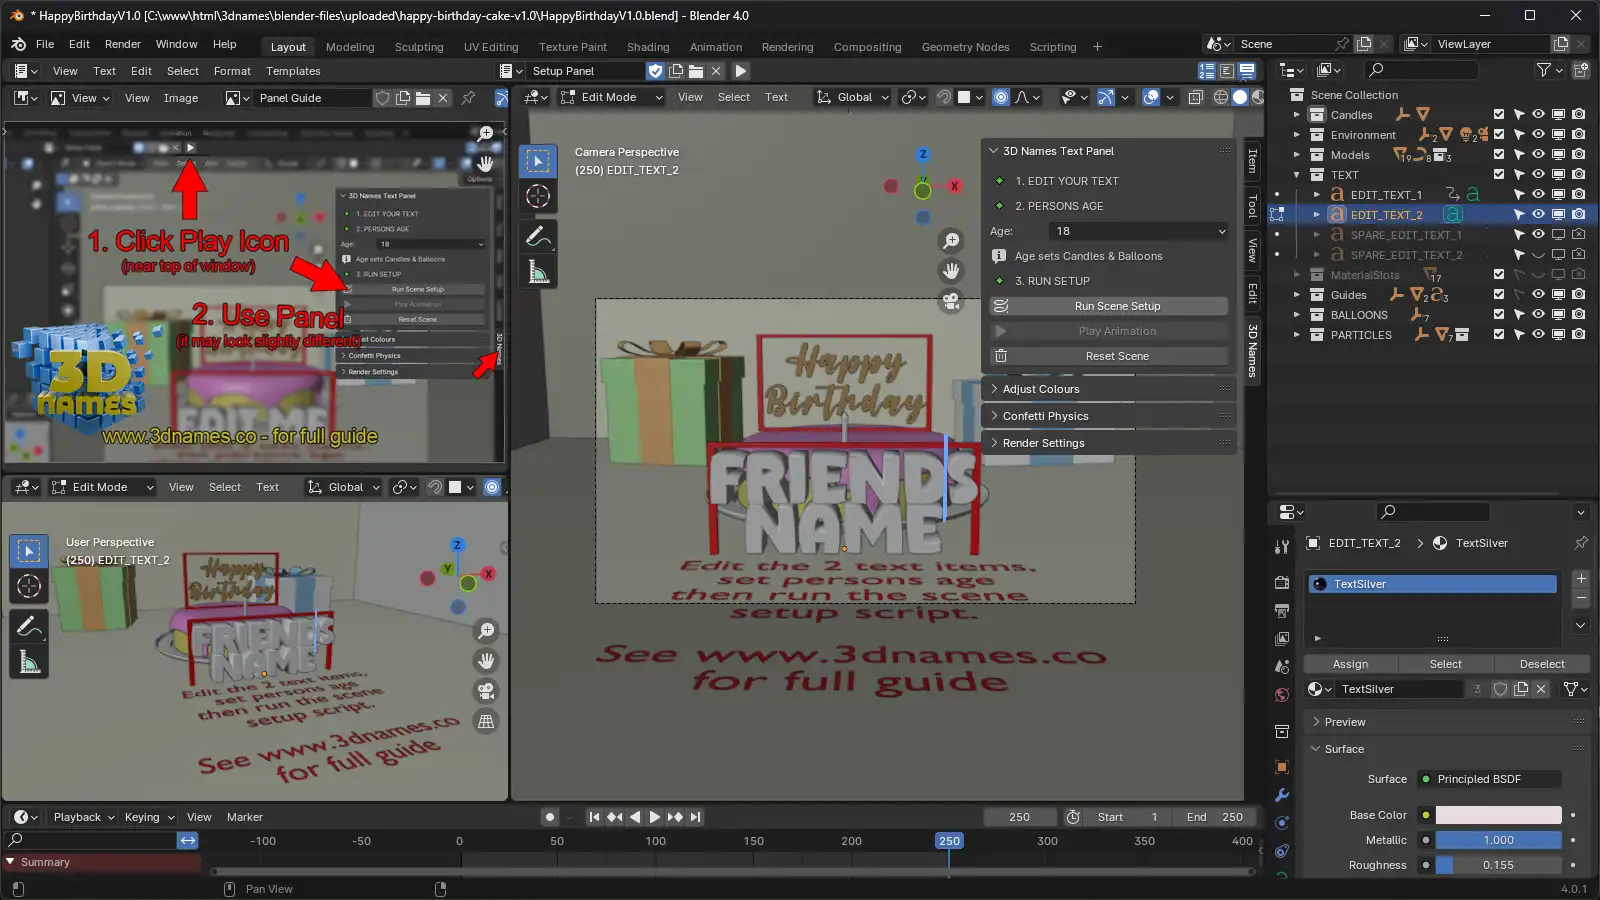
👆 In this example we have set the name text to simply be "Friends Name"
4. Scale text to fit in rectangle
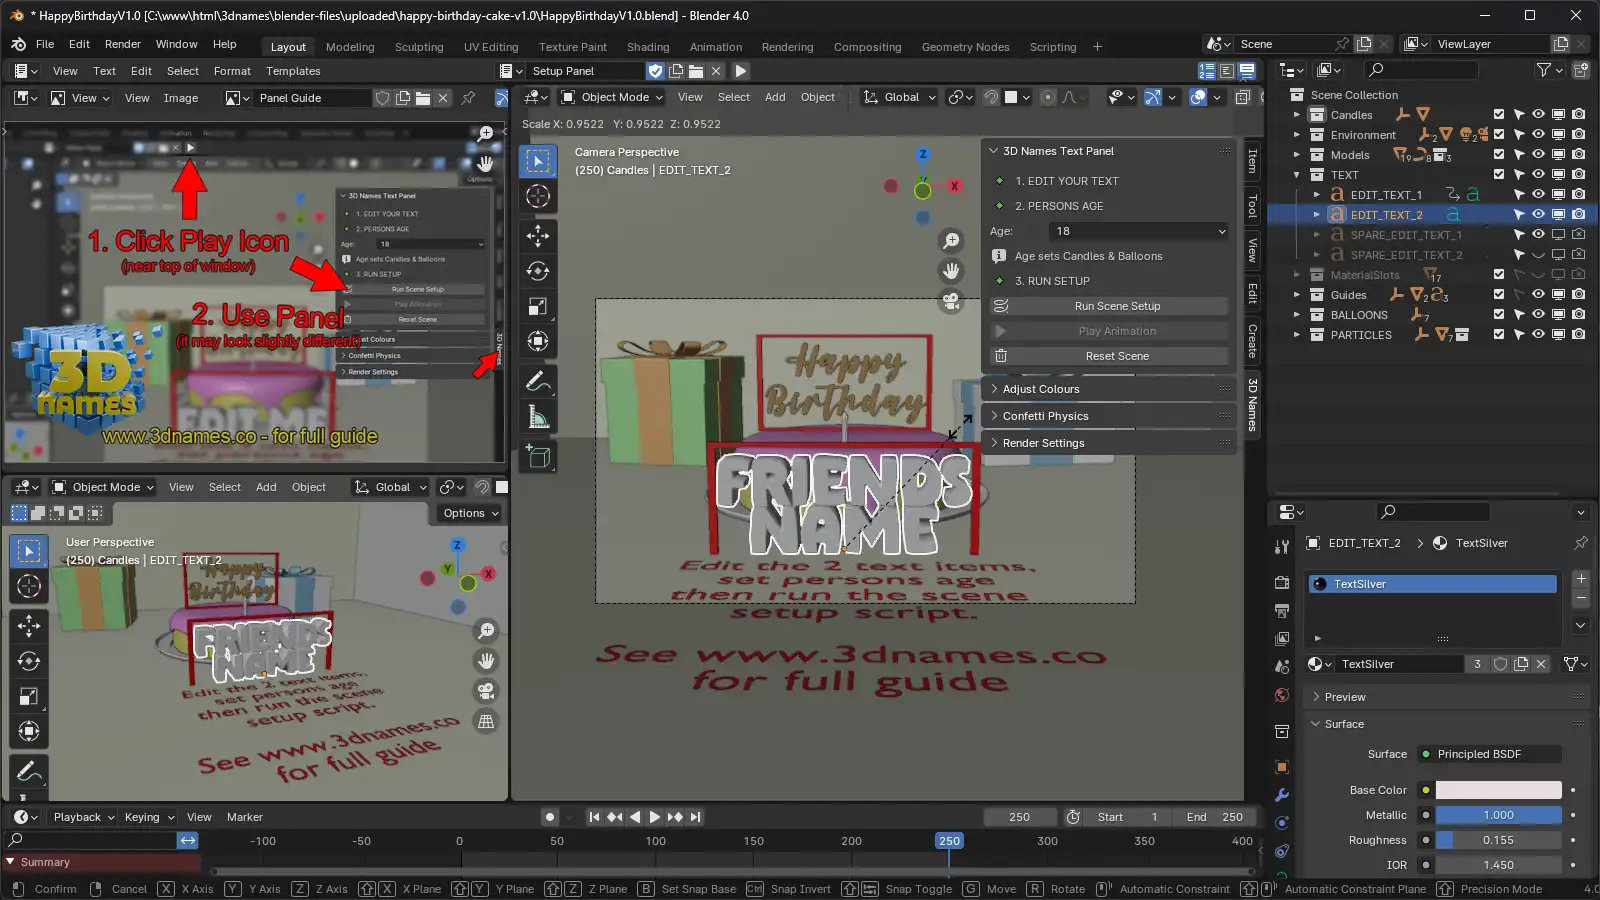
Mark as completedUse the "S" key on your keyboard to scale the text to the size you want. You can also use the "G" key to move the text around. Make sure it fits within the Red rectangle.
5. Optional - Edit the cake text
Mark as completedYou can also easily edit the cake text message using the same method as above, just make sure it fits neatly in the red rectangle.
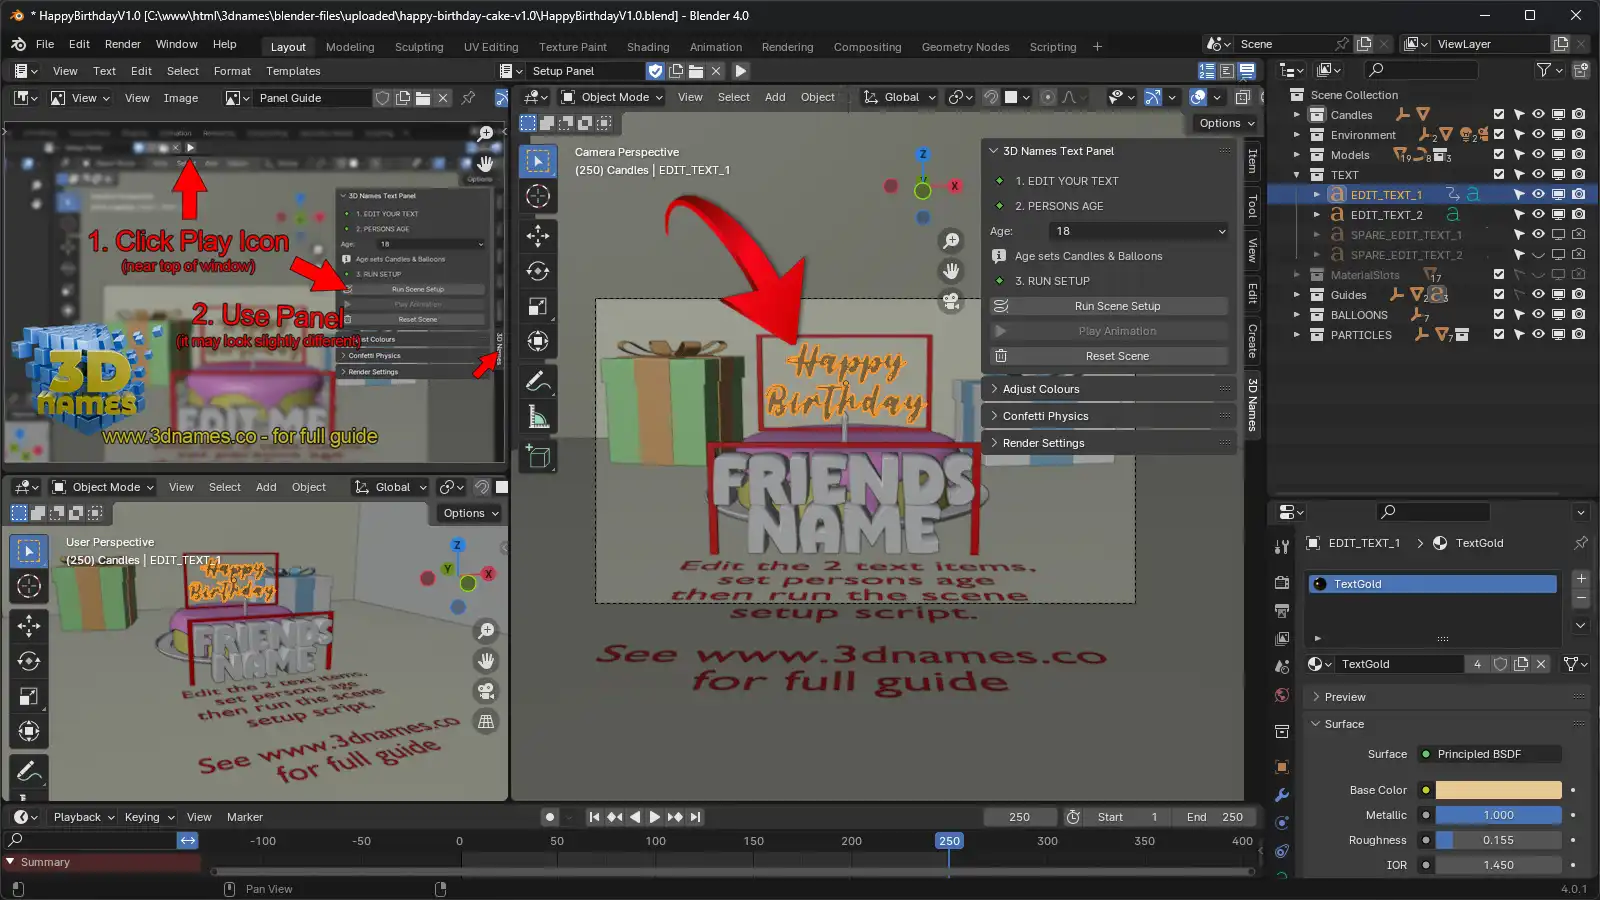
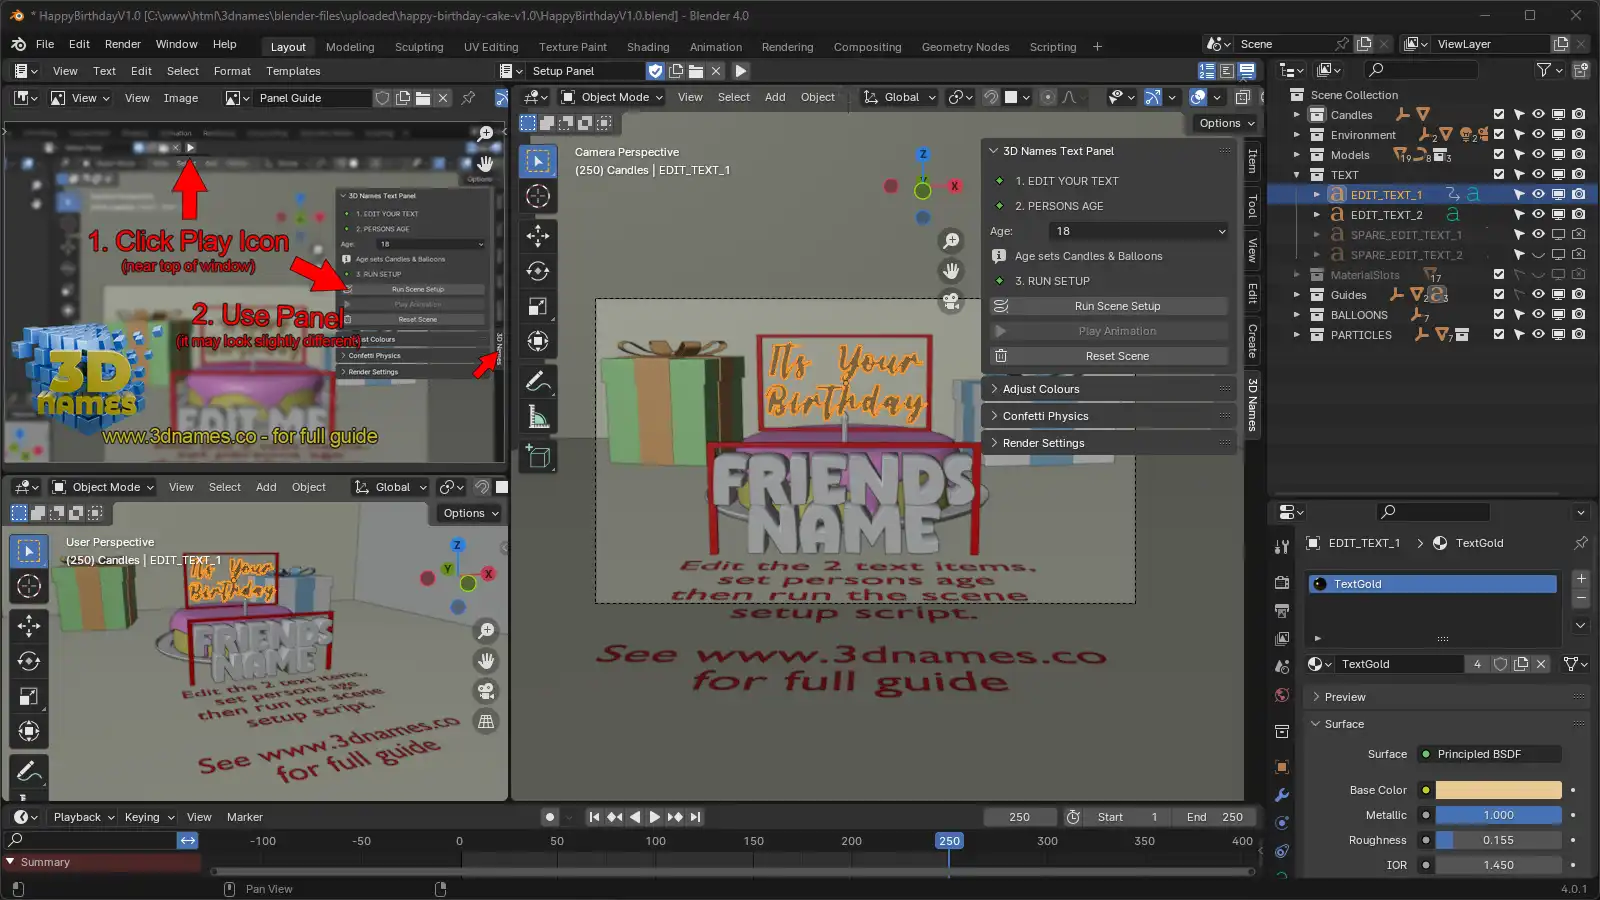
👆 Here we have changed it to read "Its Your Birthday"
6. Choose the persons age and run setup
Mark as completedOnce you have set your text, now you simply need to choose the age of the person, and press the "Run Scene Setup" button in the 3D Names Panel. This sets the numbers of candles, the balloons and also sets up all of the physics settings for the later steps. It also removes the red setup guides for you.
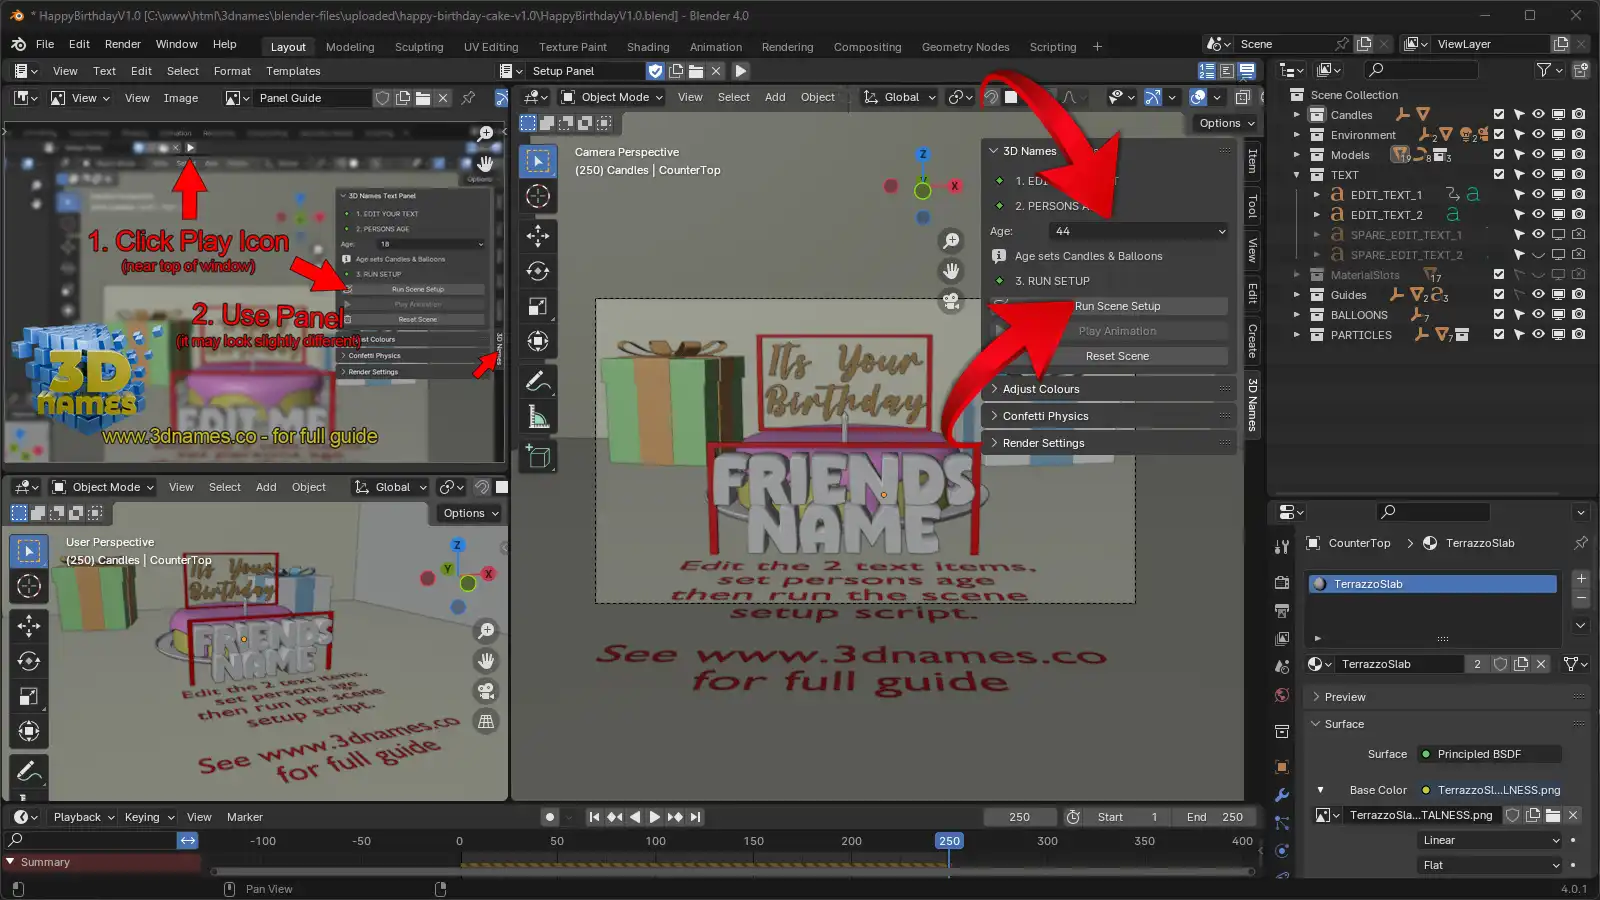
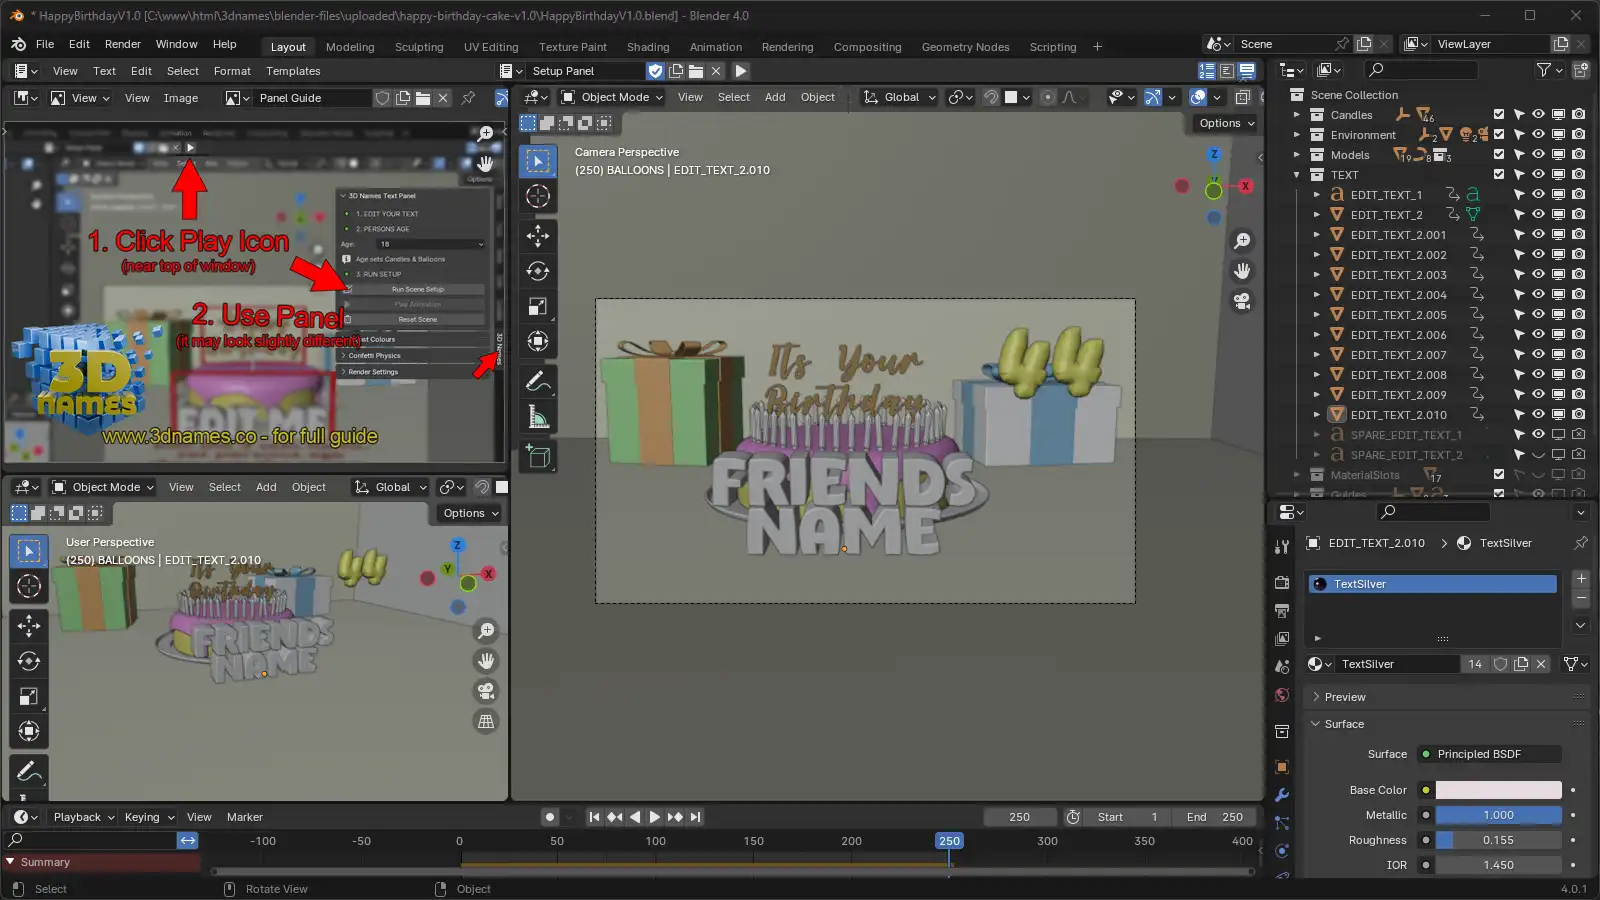
🎂 As you can see our cake now has 44 candles and the balloons also say "44" 🎈
7. Render Shorter Animation (Optional)
Mark as completedAt this point our scene is 250 frames (around 8s) long, and if you like you can render it out as is using the F12 key for an image, or "Ctrl + F12" (or "CMD + F12" on Mac) for a video. Of if you want to make it even better see the nest steps!
8. Changing Colors
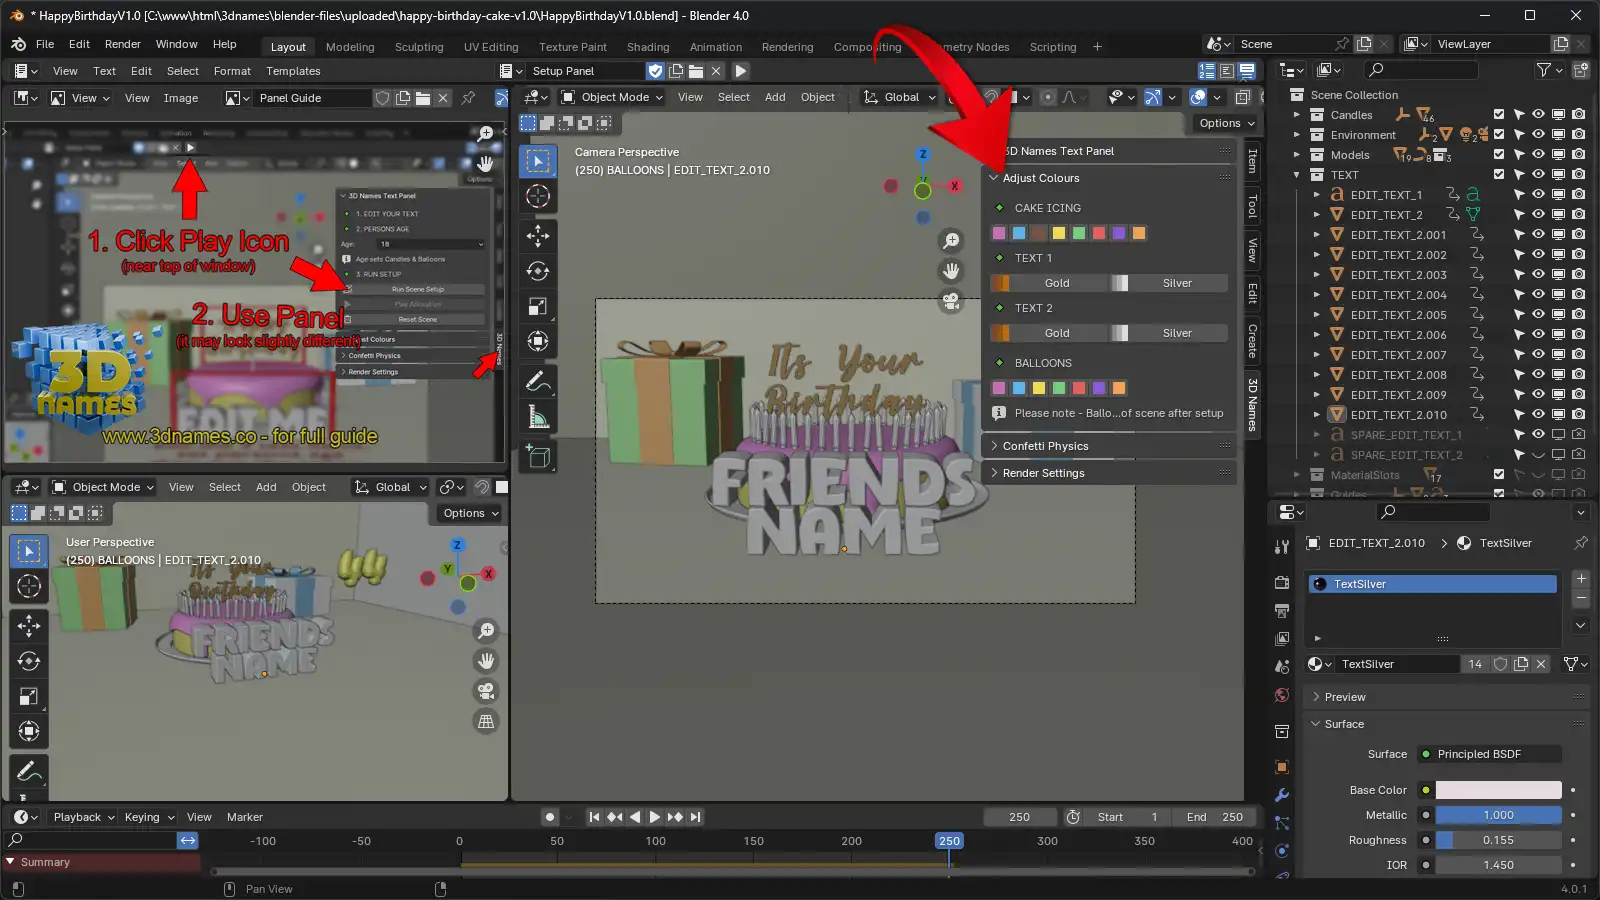
Mark as completedUnder our main setup panel, is a panel called "Adjust Colors" - here you can easily change the icing, text and color of the balloons at the end of the animation with our preset materials.
9. Adding Realistic Confetti (Optional)
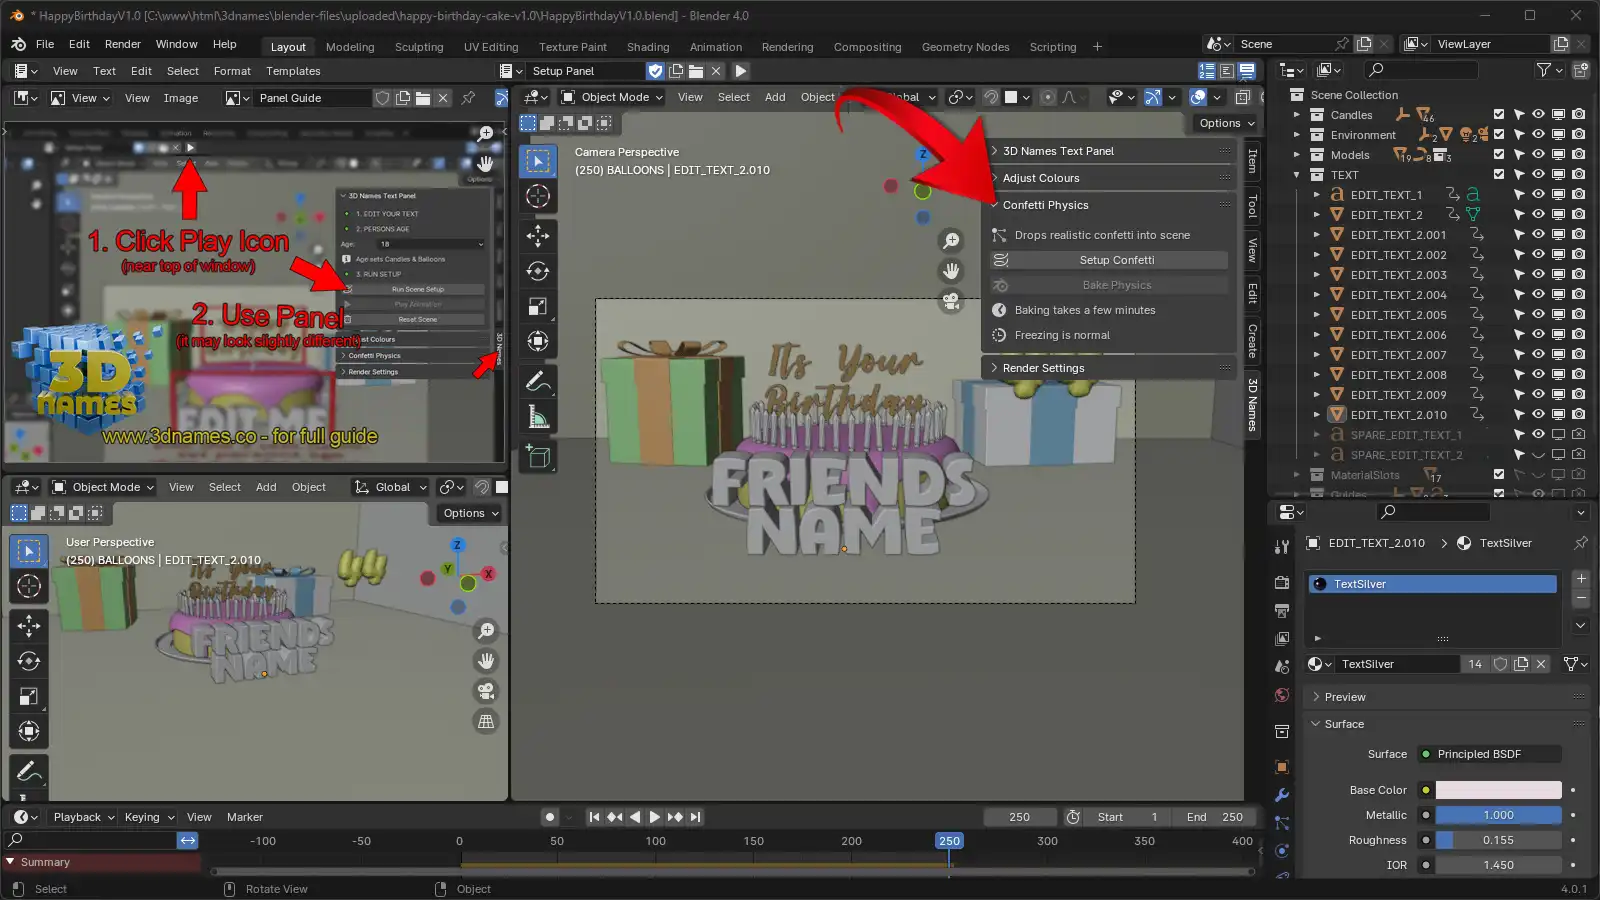
Mark as completedUnder the colors panel there is another panel called "Confetti Physics" - to set this up, you simply need to first clicks the "Setup Confetti" button - if you are on Windows this will bring up a small console window, if on a Mac then it will do this in the background and Blender may appear to freeze for a few minutes, but this is normal, then finally once this is done, press the "Bake Physics" button and it will cache the simulation data. Again this may take a few minutes, and freezing is normal, and if on windows you will see a console window pop up to show you the progress.
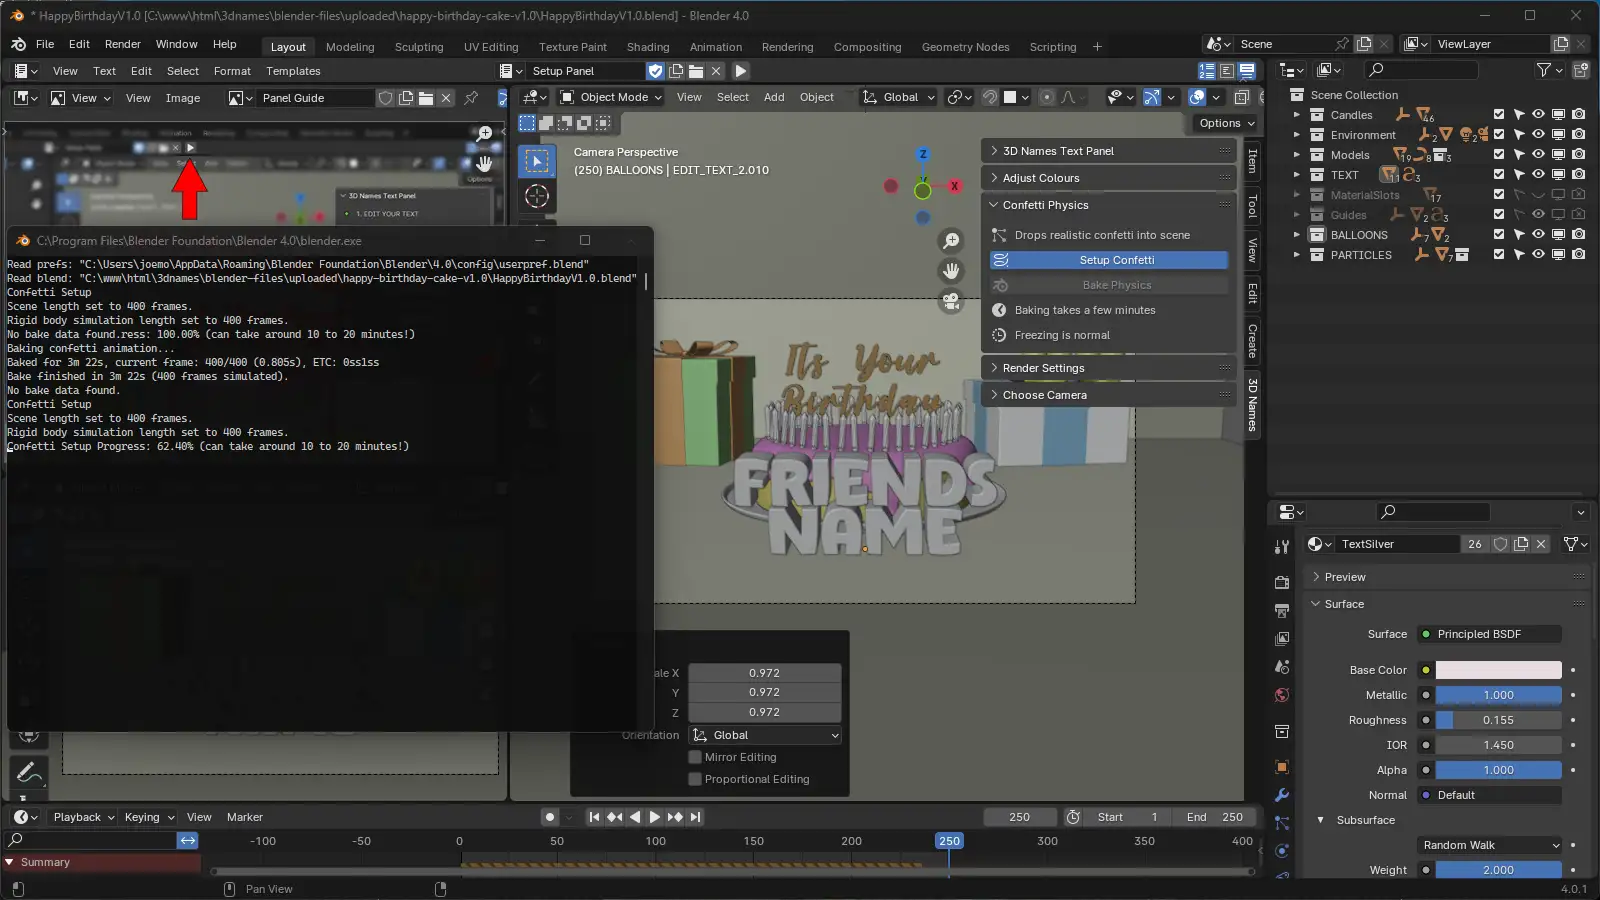
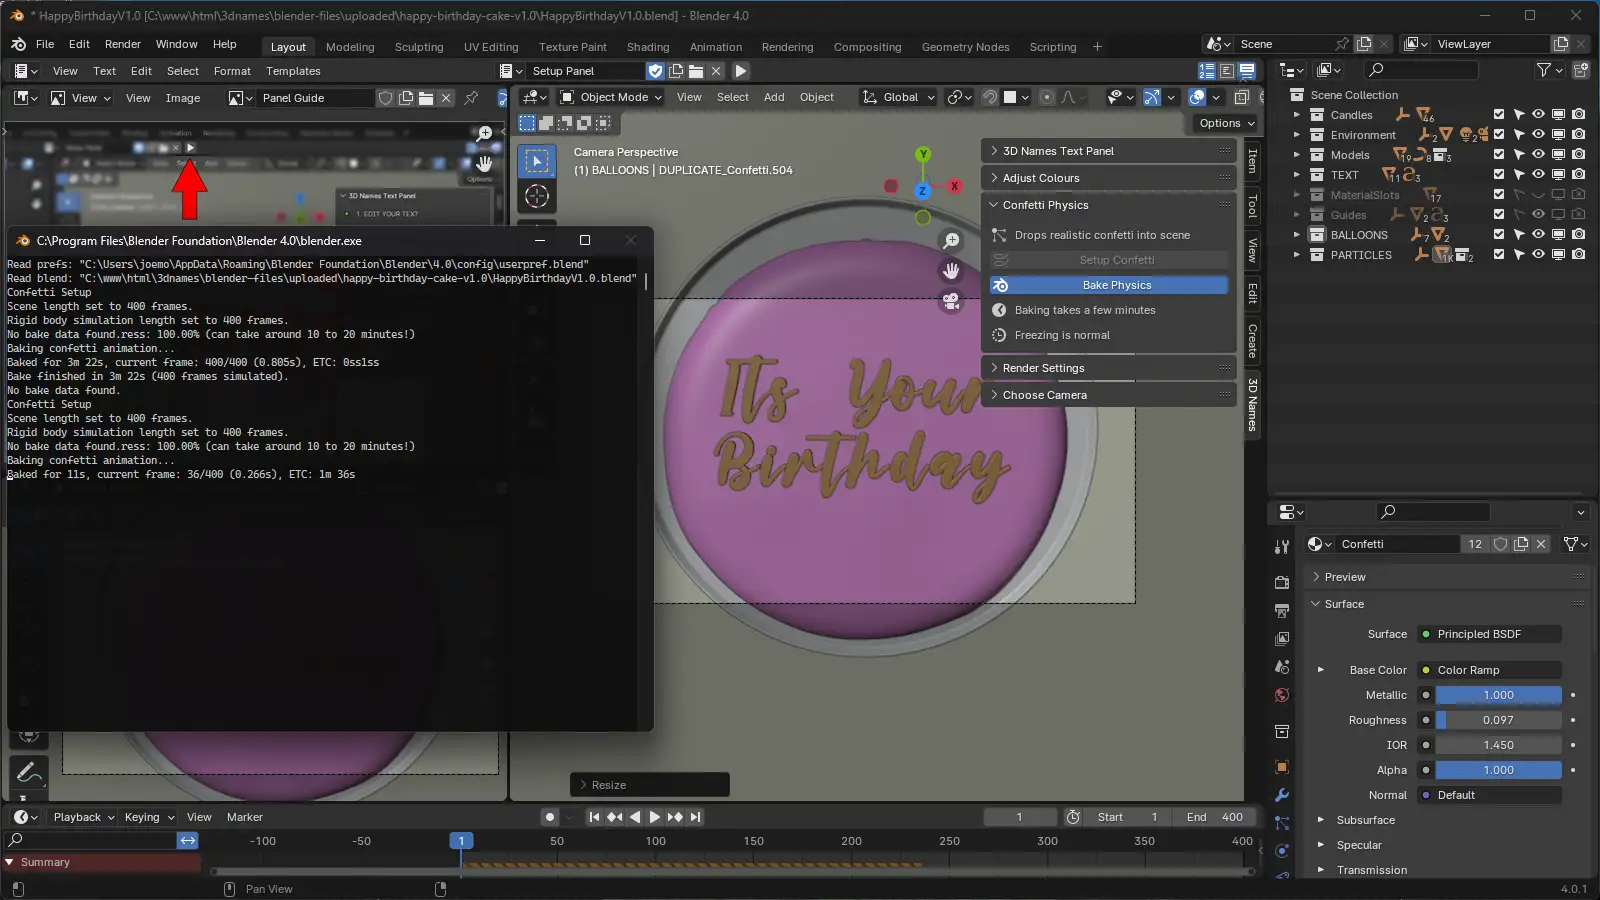
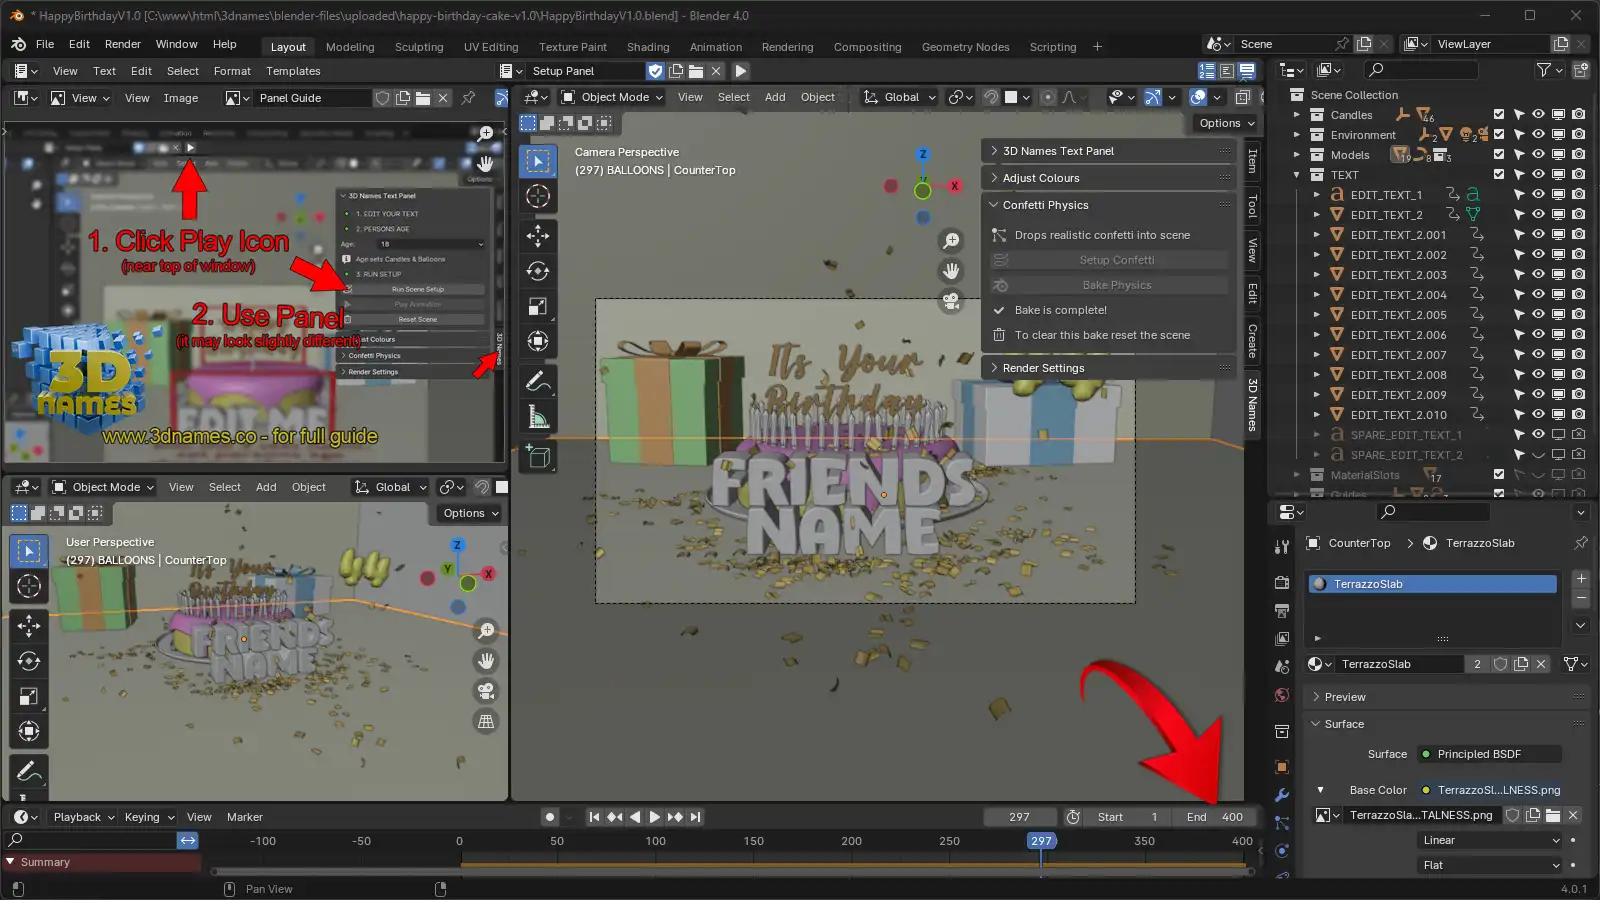
🎉 Once finished the confetti will be all setup and the animation length will be 400 frames (or around 13s)
10. Rendering Settings
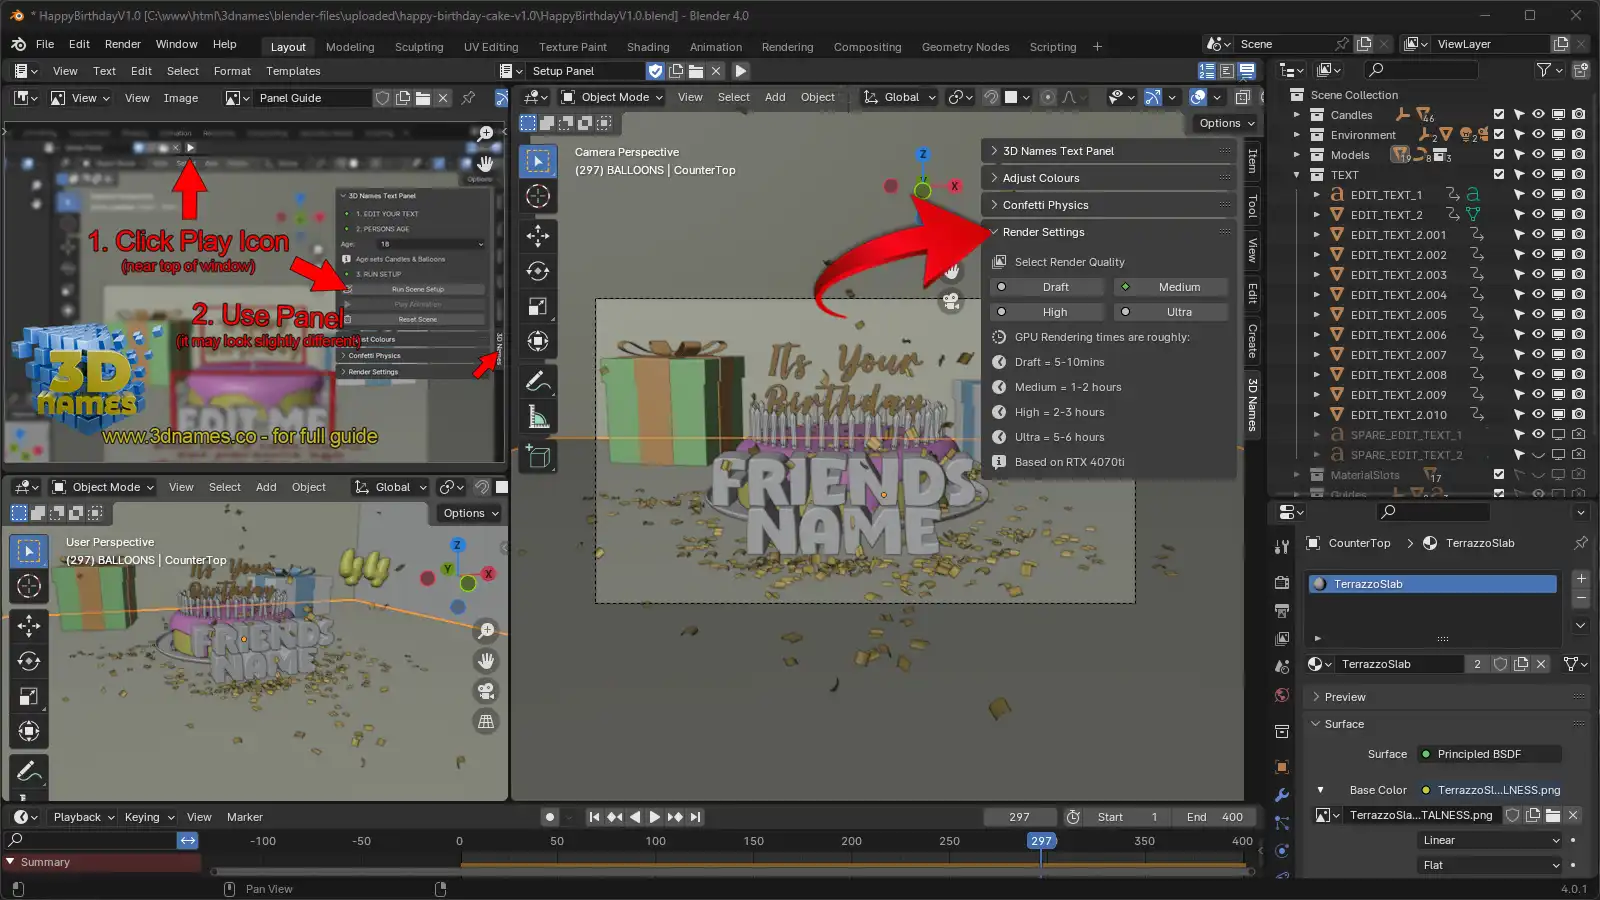
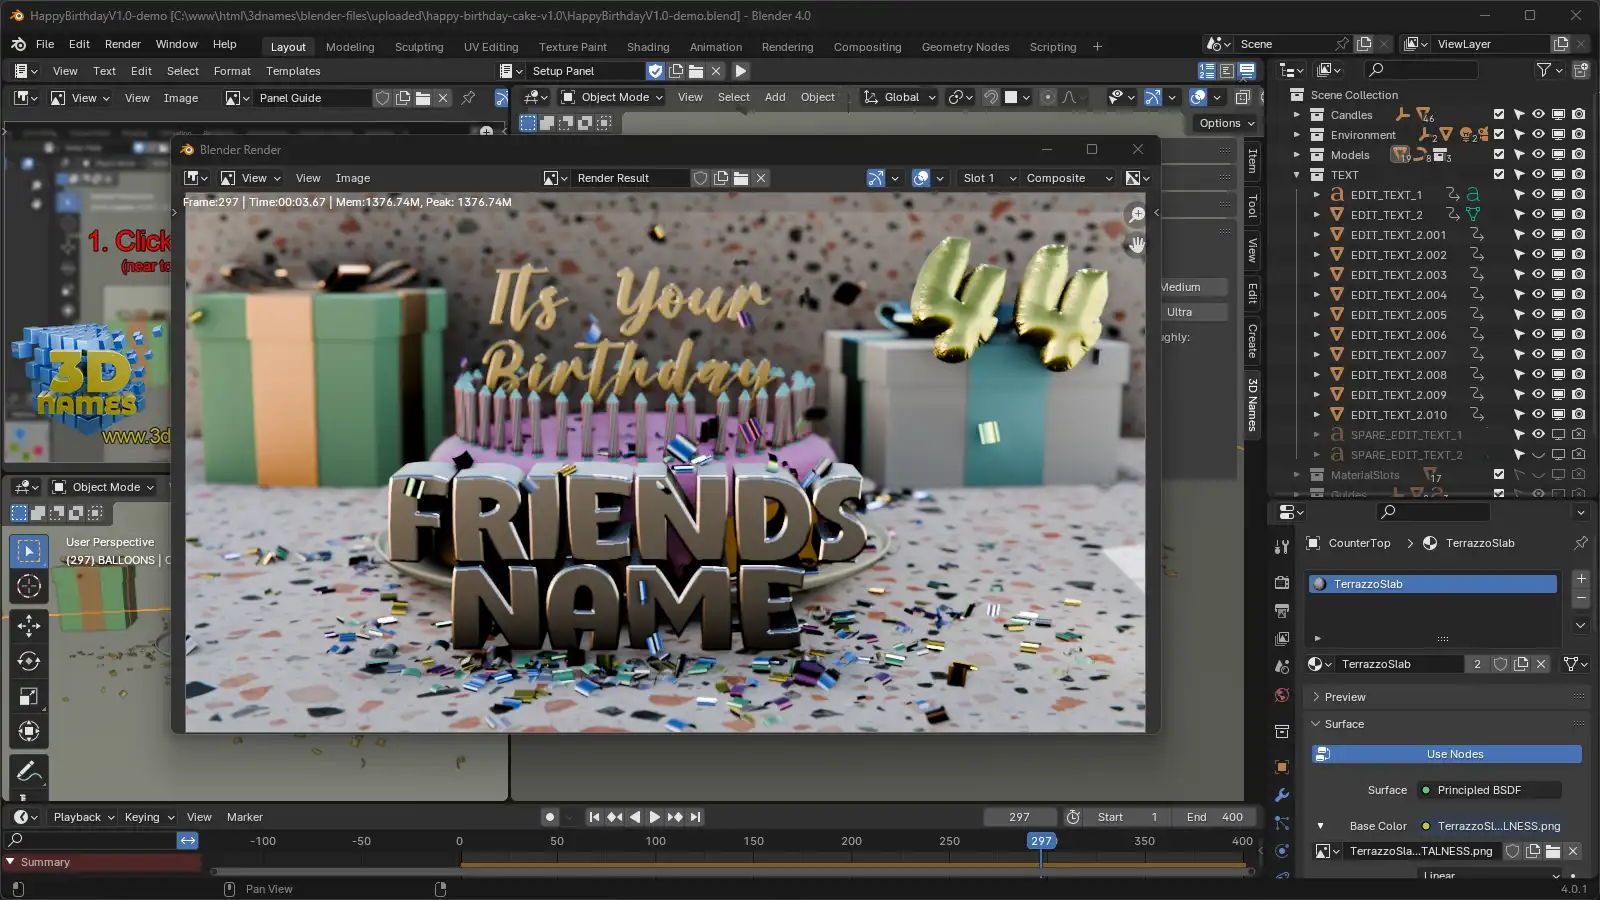
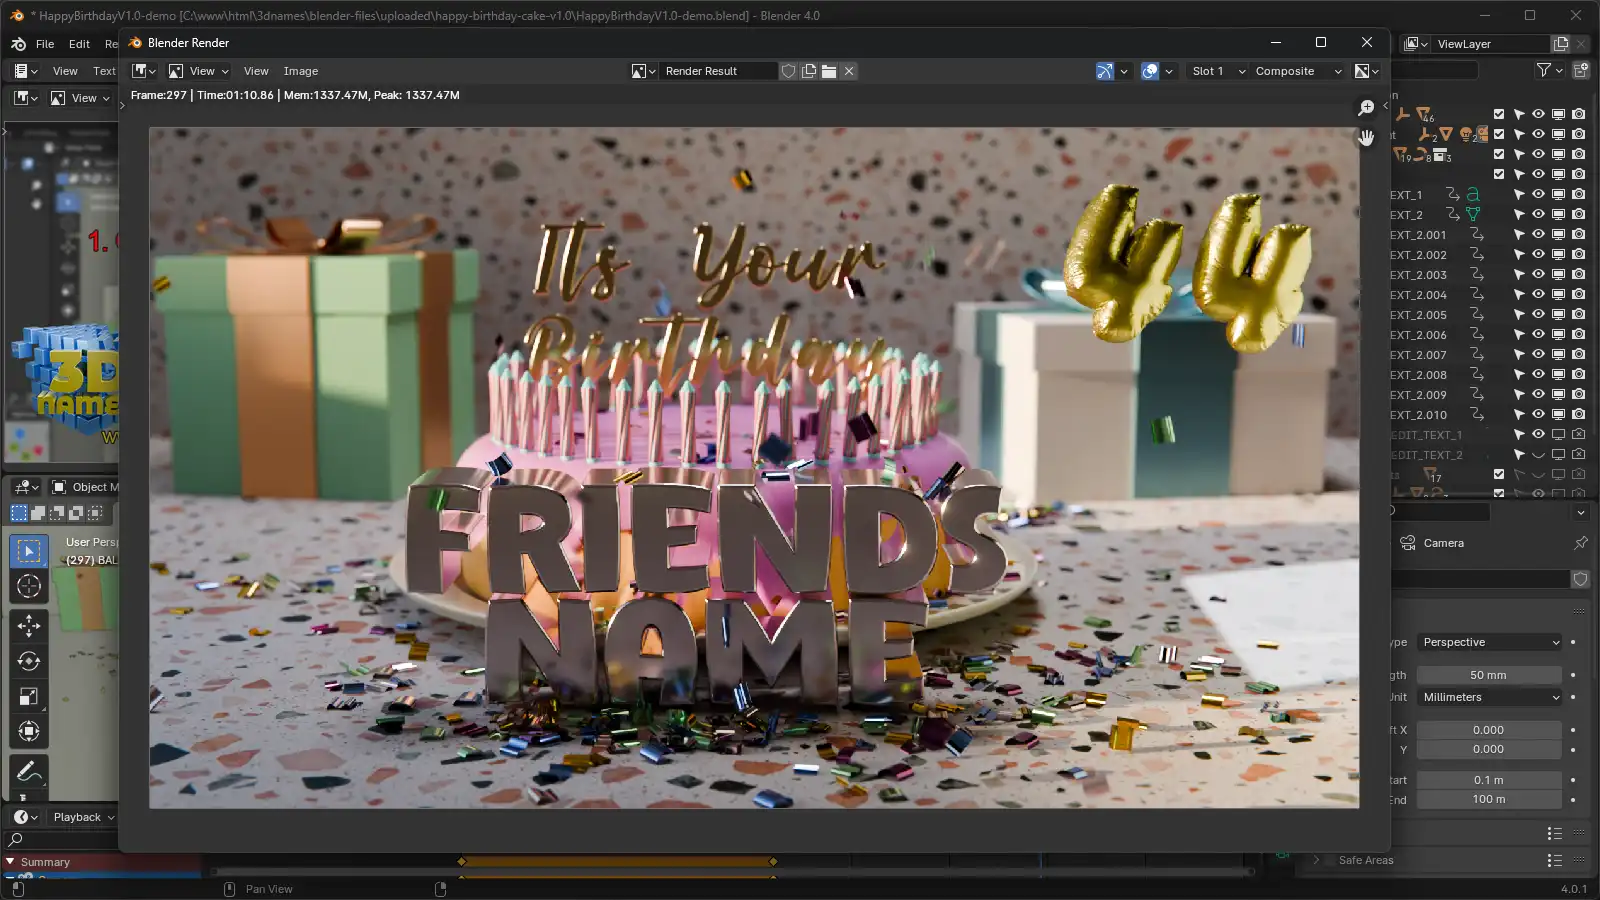
Mark as completedThe 4th panel is the "Render Settings" panel - we have added 4 settings, Draft, Medium, High and Ultra. Draft will only take around 5-10 minutes to render. Ultra can take around 5-10 hours to render, but the results are amazing. To be fair the Medium and High settings still give really good results so if you're in a rush then use either of these.
11. Landscape or Portrait
Mark as completedThe 5th and final panel is the "Choose Camera" panel - where you can choose between a Landscape or Portrait render, so if you want to Render for YouTube choose Landscape, or if you want to render for Instagram or TikTok choose Portrait.

Here is the final render of our scene in Portrait mode
A big shout out the the Blender Guru donut tutorial video that was the inspiration for this amazing scene! If you wish to learn Blender then there is no better place to start! Just search YouTube for "Blender Guru Donut Tutorial" and you'll find it!
 Blender Guru Donut Tutorial
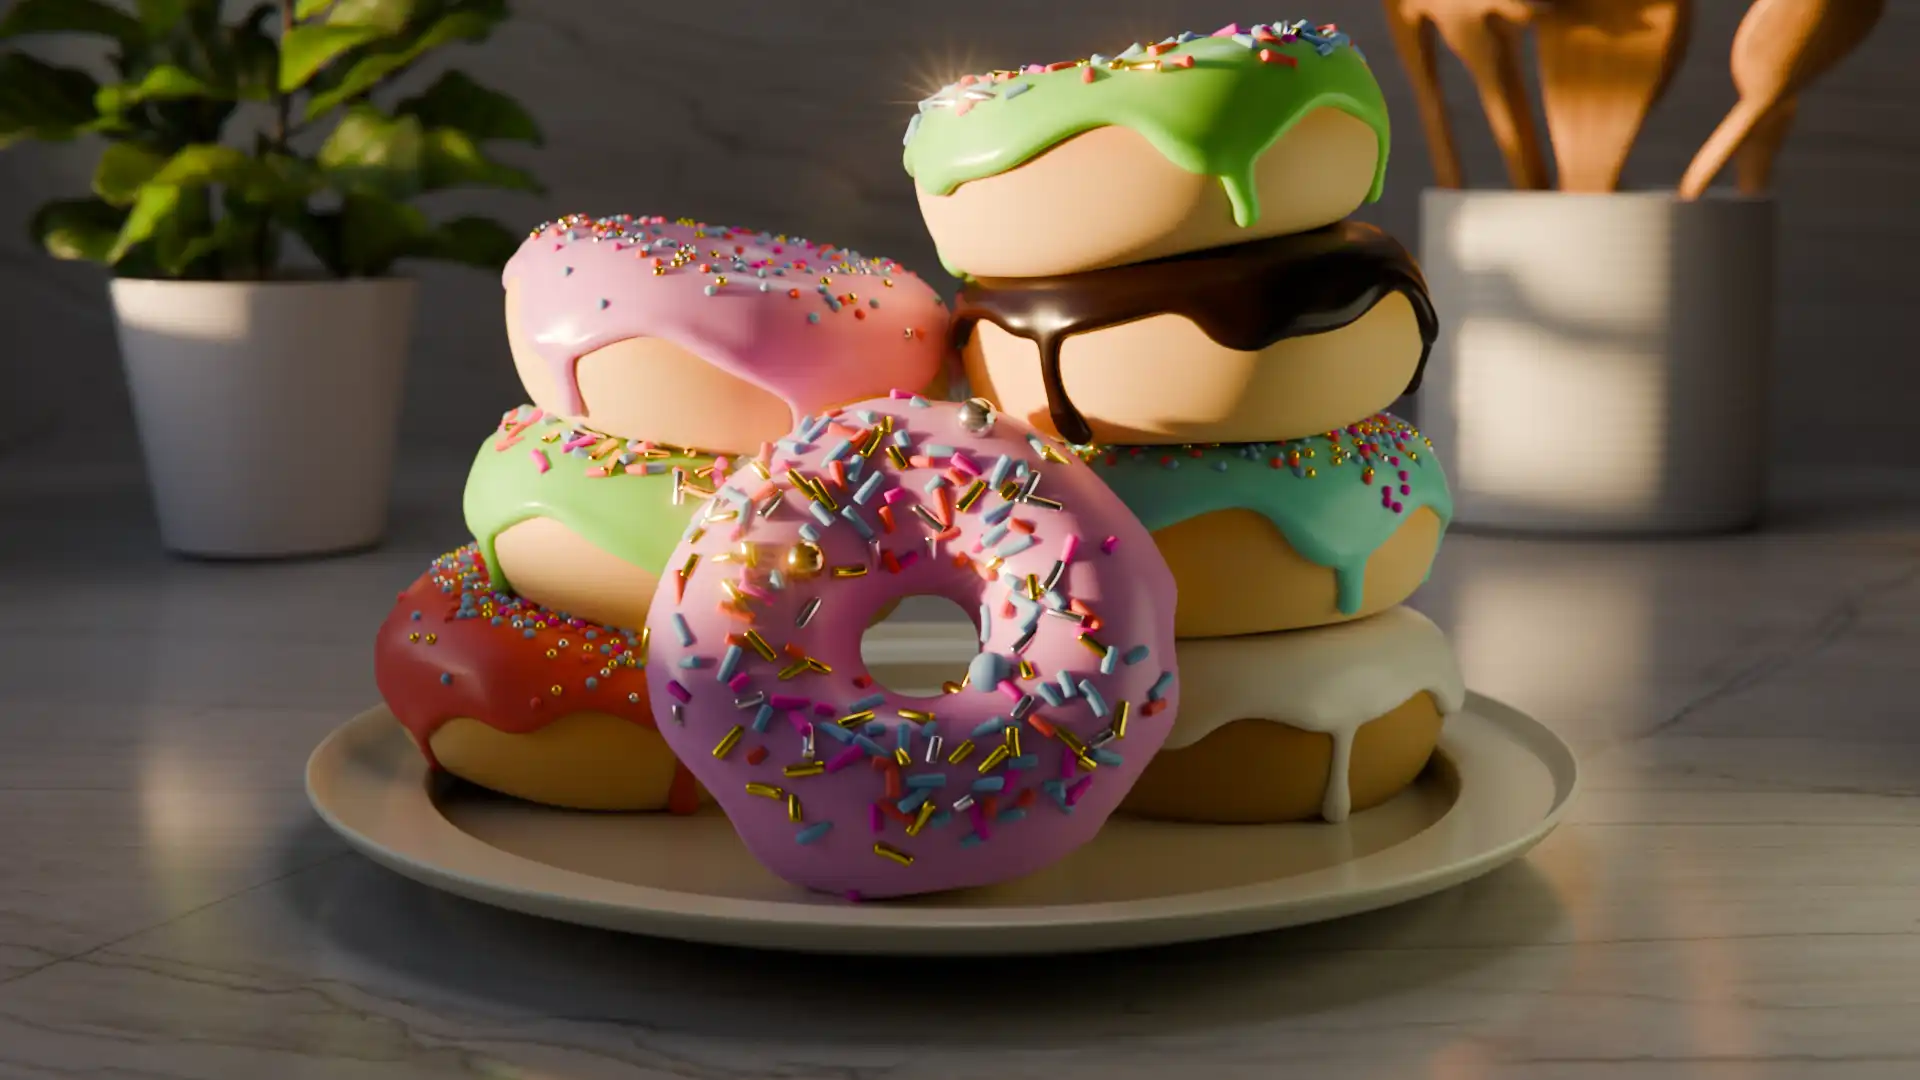 Here is my completed scene!
Understanding the render Resolutionss
Draft is half the size and is great for testing, Medium and High still give good results, but if you look at the objects in the background you'll notice some strange noise and flickering. Ultra is the best quality if you can wait overnight for a superb animation!
Turn your PNG frames into a Video
To turn your rendered PNG frames into a video, please take a look at the following Video Render Tool guide

