Full Tutorial
This full tutorial walkthrough page will show you how you can create all of these 3D Text Effects using Blender.
👆 Blender Speed Run
🏃♂️ Watch this speed run of 20 Blender animations being created in just 8 minutes!

Part 1 - Simple text editing
This will show you the basic of editing text in Blender using the "Tab" , "G" and "S" keys
Detailed Setup Guide for Carbon Fibre Blue- Open up the Blue Carbon Fibre file - this is a very simple file that doesn't have any setup Panel, and is used to demonstrate the very basics of text editing.
- To edit the text, click on the text object in the 3D view, then press the Tab key to enter edit mode. You can now edit the text. Press Tab again to exit edit mode.
- To move the text, press the "G" key (G for Grab) - You can then move the text object around. Click anywhere with the left mouse button to confirm the move, or right mouse click to cancel the move.
- For better control when moving objects, you can press the "X", "Y" or "Z" keys after pressing the "G" key to move the object along the global X, Y or Z axis of the scene.
- If you double Tap thew X,Y or Z keys after pressing the "G" key, you can move the object along its local X, Y or Z axis.
- To resize the text object, press the "S" key (S for Scale), this will let you scale it up or down, click anywhere with the left mouse button to confirm the scale.
- Now press the F12 key to render the image. A new window will popup with the rendered image. Press F11 to make the window full screen. Press ESC to exit full screen mode. Press F12 to close the render window.
- To render the video as frames press the CTRL+F12 (or CMD+F12 on Mac) keys. This will render the video as frames saved to the "/renders" subfolder. You can then use the Video Sequence Editor to compile the frames into a video in the next Tutorial
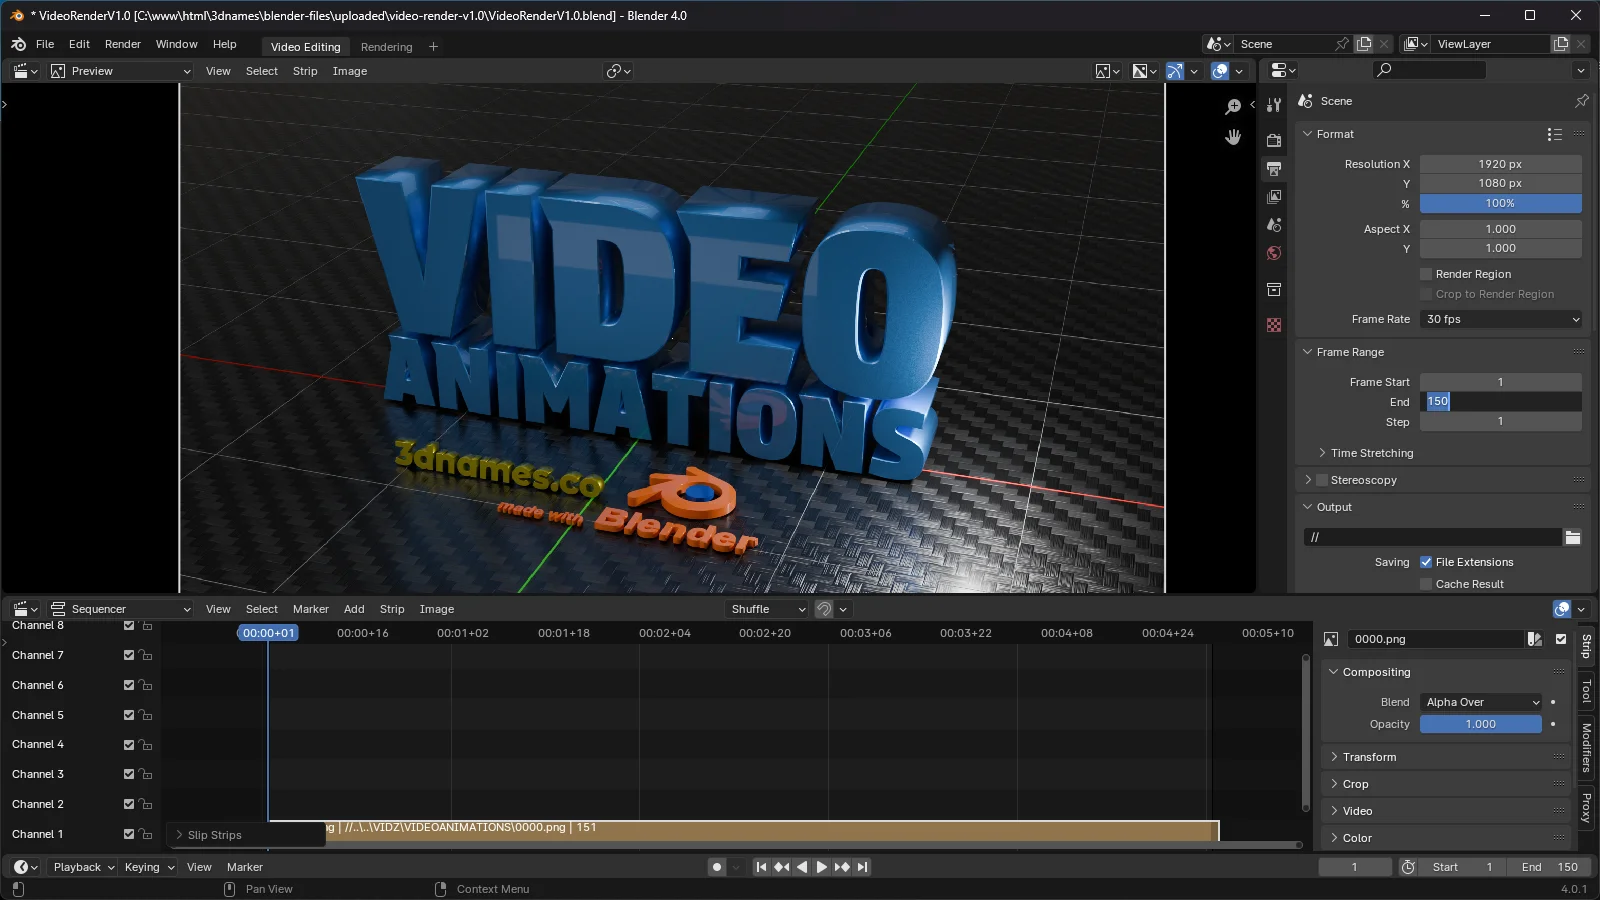
Part 2 - How to turn your rendered PNG's into a video
This tutorial will show you how to use the Video Sequence Editor to turn your rendered PNG's into a video
Detailed Setup Guide for Easy Video Render- Open up the Video Render file - this is still using Blender but a trimmed down layout and pre-configured settings to render your frames into an MPEG video file.
- Press shift+A in the timeline to add your rendered PNG's to the timeline.
- Change the End Frame value to match the number of frames you rendered. WE have set it to 150 by default as most of our templates use this value
- We have also set the output directory to be // which means it'll save where the blend file is saved. You can change this to a specific folder if you want to save it elsewhere.
- Press CTRL+F12 (or CMD+F12 on Mac) to render the video. This will render the video as a video file
- Enjoy your awesome looking new video!

Part 3 - Using the included Panel Script
This tutorial will show you how to use the included Panel Script to easily change the colors of the text and the background
Detailed Setup Guide for Metallic Rotating Text- Open up the Metallic Rotating Text file
- To Launch the Panel Script there is a Play Icon ▷ at the top of the window - click this to open the Panel
- The Panel will appear on the right hand side. If it's not visible, press the N key to toggle it open/closed
- Now try editing your text, resizing and then use our Panel to select from a few different pre-made colors for the text and background...
Recap - so far we have learnt how to edit text, render images and videos and use the Panel to change colors... now let's get into some more advanced stuff!
Part 4 - Bounce Animation
Lets open up the Bounce In Text file and see how we can animate the text to bounce in using the panel
Detailed Setup Guide for Bounce In Text- Open up the Bounce In Text file
- Launch the Panel and edit the text - keep it on one line, multiples lines do not work in this file
- Click the "Add Bounce" button in the panel... and wait a moment for it to apply rhe effect
- Once done you can then play the animation and see your text bouncing in with a twist and wobble
- If you wish to reset the scene back to its original state, then press the "Reset Button" in the panel
Part 5 - Adding Bevels to text
This scene adds 3 Bevel layers to your text and lets you easily change the colors.
Detailed Setup Guide for Bevelled Text- Open up the Bevelled Text file
- Launch the Panel and edit the text
- Click the "Run Scene Setup" button in the panel... and wait a moment for it to apply the effect
- Once done you can then play the animation and see your text with 3D bevels
- You can now also change the texture of the inside text, and the colors of the 2 bevels using the buttons in the panel!

Part 6 - Lets add some particles
This scene adds a particle system thats loops around your text
Detailed Setup Guide for Particle Dust- Open up the Particle Dust file
- Launch the Panel and edit your text
- Click the "Setup Particles" button in the panel
- Now press the "Bake Particles" button in the panel
- By "Baking" the particles into the scene it mean they are saved into memory and you can play the animation without having to re-calculate the particles each time, or you can save the file and re-open it and the particles will still be there
Recap - You have now managed to learn how using the 3D Names Side Panel can be used to easily add animations or effects, and although it was a small Bake, you did you first one... many of the next scenes require bigger bakes! So lets take a look

Part 7 - Baby Blocks
How to use pre-made objects as text characters, instead of a standard text object.
Detailed Setup Guide for Baby Blocks Animation- Open up the Baby Blocks file - you may see the scene looks like it doesn't have any text and looks empty - this is normal
- Launch the Panel and notice there are 2 text input fields - we can add up to 2 lines of text each with up to 14 characters
- Select a Bounciness setting, either Low, Medium, High or Ultra
- Choose a background color
- Press the Run Setup Button and play the animation - you'll notice your text now drops in as baby blocks!
- You can now play the animation and see your text made up of baby blocks

Part 8 - Bullet Shatter
Using the Voronoi Fracture and Boolean modifiers to shatter text with a bullet
Detailed Setup Guide for Bullet Shatter Text- Open up the Bullet Shatter file
- Launch the Panel and edit your text
- Press the "Low" button in the panel - this will add a Voronoi Fracture modifier to the text and may take a moment to apply - if Blender freezes this is normal, just wait until it's done
- Press the
- Press the "Play Animation" button in the panel to see the bullet shoot through your text and shatter it into chunks
- Now try resetting the scene and trying the other settings - Medium, High and Ultra - be warned the higher you go the longer it takes to apply the effect
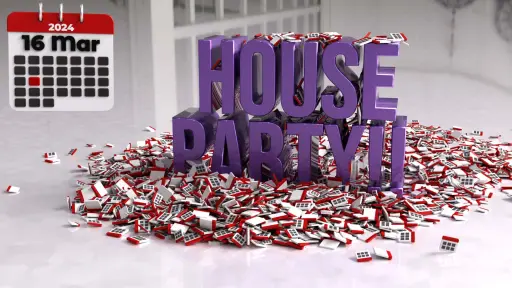
Part 9 - Calender drop animation
Using rigid body physics to drop mini calendars over you text, as well as updating the date via our Panel
Detailed Setup Guide for Calendar Animation- Open up the Calendar Animation file
- Launch the Panel and edit your text and resize it into place
- Use the Panel to choose a date and press the "Apply Date" button - this will set the correct date on the larger animated calendar.
- Once happy press the "Setup Physics" button in the panel - this will add a rigid body physics system to the text and setup our mini calendars this may take a moment to apply - if Blender freezes this is normal, just wait until it's done
- Next press the "Bake Physics" button in the panel - this will bake the physics into the scene so you can play the animation without having to re-calculate the physics each time, or you can save the file and re-open it and the physics will still be there
- Press the "Play Animation" button in the panel to see the mini calendars drop onto your text
Recap - Now you should understand that in order to cache our Physics data it's super important to "Bake" the data into the scene - this is very common in Blender and is used for all sorts of simulations, not just physics! The majority of our scenes have this step, so it's important to understand it!

Part 10 - Embossed Text
Using Cloth Physics to create a 3D embossed text effect
Detailed Setup Guide for Embossed Text- Open up the Embossed Text file
- Launch the Panel and edit your text
- Press the "Run Scene Setup" button in the panel - this will add a cloth physics system to the text and may take a moment to apply - if Blender freezes this is normal, just wait until it's done
- Press the "Play Animation" button in the panel to see the text rise up and emboss itself
- You can now play the animation and see your text rise up and emboss itself

Part 11 - Flame Thrower
Using the fire and smoke simulation to create a flame thrower effect
Detailed Setup Guide for Flame Thrower Text- Open up the Flame Thrower file
- Launch the Panel and edit your text
- Press the "Run Scene Setup" button in the panel - this will add a fire and smoke simulation to the text and may take a moment to apply - if Blender freezes this is normal, just wait until it's done
- Press the "Play Animation" button in the panel to see the text engulfed in flames
- You can now play the animation and see your text engulfed in flames

Part 12 - Gold Peel Reveal
Using the cloth physics to create a gold peel that comes off to reveal your text
Detailed Setup Guide for Gold Peel Reveal- Open up the Gold Peel Reveal file
- Launch the Panel and edit your text
- Press the "Run Scene Setup" button in the panel - this will add a cloth physics system to the text and may take a moment to apply - if Blender freezes this is normal, just wait until it's done
- Press the "Play Animation" button in the panel to see the gold peel come off and reveal your text
- You can now play the animation and see your text revealed

Part 13 - Birthday Cake Animations
Create an insanely detailed birthday cake with candles and confetti that drops onto your text
Detailed Setup Guide for Happy Birthday Cake- Open up the Happy Birthday Cake file
- Launch the Panel and edit the 2 text items, also set the users age in the panel
- Press the "Run Scene Setup" button in the panel - this will then drop that number of candles onto the cake, as well as display floating balloons at the end that represent the users age
- You can now Render out a short animation of 250 frames
- Optional - Now we can go a step further and if you open the "Confetti Physics" panel, press the "Setup Confetti" button, and then press the "Bake Confetti" button, you can then play the animation and see the confetti fall down around the cake - this also increases the animation from 250 frames to 400 frames
- We have also added 2 more panels that let you change the color of the text, the cake icing and the balloons! Plus there is a Panel that lets you easily control the render settings... choose from Draft, Low, Medium and High!

Part 14 - Inflated Text
Using the cloth physics to created an effect that inflates the text from left to right
Detailed Setup Guide for Inflated Bubbles- Open up the Inflated Bubbles file
- Launch the Panel and edit your text
- Press the "Run Scene Setup" button in the panel - this will add a cloth physics system to the text and may take a moment to apply - if Blender freezes this is normal, just wait until it's done
- Press the "Play Animation" button in the panel to see the text inflate from left to right
- You can now play the animation and see your text inflate

Part 15 - Liquid Ooze
Using the fluid physics to create a liquid that oozes over your text
Detailed Setup Guide for Liquid Ooze Text- Open up the Liquid Ooze file
- Launch the Panel and edit your text
- Press the "Run Scene Setup" button in the panel - this will add a fluid physics system to the text and may take a moment to apply - if Blender freezes this is normal, just wait until it's done
- Bake the fluid physics - on this scene we show you the instructions on how to bake manually by going to the "Physics" tab and pressing the "Bake" button
- Press the "Play Animation" button in the panel to see the liquid ooze over your text
- You can now play the animation and see your text covered in oozing gooey liquid

Part 16 - Particles Dissolve
Using particle systems to dissolve text into particles
Detailed Setup Guide for Particles Dissolve- Open up the Particles Dissolve file
- Launch the Panel and edit your text
- Press the "Run Scene Setup" button in the panel - this will add a particle system to the text and may take a moment to apply - if Blender freezes this is normal, just wait until it's done
- Press the "Play Animation" button in the panel to see the text dissolve into particles
- You can now play the animation and see your text dissolve into particles

Part 17 - Using displacement in 3 different textures
Using 3 different textures to create a scene with rocks and water
Detailed Setup Guide for Rocks and Water- Open up the Rocks and Water file
- Launch the Panel and edit your text
- Choose from the 3 different textures - Mossy, Rocks or Pebbles
- Also choose from 3 different colors for the text - Red, Blue or Green
- Press the "Play Animation" button in the panel to see the animation

Part 18 - Shrink Wrapped Text
Using cloth modifiers with pressure values to shrink wrap text
Detailed Setup Guide for Shrink Wrapped Text- Open up the Shrink Wrapped Text file
- Launch the Panel and edit your text
- Press the "Run Scene Setup" button in the panel - this will add a cloth physics system to the text to shrink wrap it and may take a moment to apply - if Blender freezes this is normal, just wait until it's done
- Press the "Play Animation" button in the panel to see the shrink wrapped text
- You can now play the animation and see your text shrink wrapped

Part 19 - Water Shoot
Using fluid physics and time scale to create slo-mo effect of water flowing behind your text
Detailed Setup Guide for Water Shoot- Open up the Water Flow Behind Text file
- Launch the Panel and edit your text
- Press the "Run Scene Setup" button in the panel - this will add a fluid physics system to the text and may take a moment to apply - if Blender freezes this is normal, just wait until it's done
- Bake the fluid physics - on this scene we show you the instructions on how to bake manually by going to the "Physics" tab and pressing the "Bake" button
- Press the "Play Animation" button in the panel to see the water flow behind your text

Part 20 - Wave Animated Text
Using Geometry nodes to repeat text object into multiple objects
Detailed Setup Guide for Wave Animated Text- Open up the Wave Animated Text file
- Launch the Panel and edit your text
- Press the "Run Scene Setup" button in the panel - this will add a geometry node system to the text and may take a moment to apply - if Blender freezes this is normal, just wait until it's done
- Press the "Play Animation" button in the panel to see the text wave

Part 21 - Wobbly Text
Using Geometry node to create text instead of the default text operator
Detailed Setup Guide for Wobbly Text- Open up the Wobbly Text file
- Launch the Panel and edit your text using the panel - the text cannot be edited directly here as it's using a geometry node system
- Press the "Run Scene Setup" button in the panel - this will add a geometry node system to the text and may take a moment to apply - if Blender freezes this is normal, just wait until it's done
- Press the "Play Animation" button in the panel to see the text wobble

Part 22 - Using the Molecular+ plugin
Using the Molecular+ plugin to create a scene with balls falling down steps
Detailed Setup Guide for Amazeballs- Open up the Balls Down Steps file
- Launch the Panel and edit the 2 text objects
- Press the "Run Scene Setup" button in the panel - this sets up the scene with the correct Physics settings
- Press the "Run Simulation" button in the panel - this will start to run the balls down the steps in realtime... wait until it's finished
- Once it's done press the "Bake Simulation" button in the panel - this will bake the simulation into the scene so you can play the animation without having to re-calculate the physics each time, or you can save the file and re-open it and the physics will still be there
- Press the "Play Animation" button in the panel to see the balls fall down the steps
- Optional - You can change the colors of the Balls, the steps and the text using our "Adjust Colors" panel

Part 23 - Object Dropper
Using a particle system with different objects as rigid body physics
Detailed Setup Guide for Object Dropper- Open up the Object Dropper file
- Launch the Panel and edit your text
- Choose which of the four objects you wish to drop!
- Press the "Run Scene Setup" button in the panel - this will add a particle system of the objects ready to be dropped onto the text - if Blender freezes this is normal, just wait until it's done
- Press the "Bake Physics" button in the panel - this will bake the physics into the scene so you can play the animation without having to re-calculate the physics each time, or you can save the file and re-open it and the physics will still be there
- Press the "Play Animation" button in the panel to see the objects drop onto your text
- You can now play the animation and see your text covered in objects